When you move in the real world, you typically fill out a change of address form with the post office and boom! —Your mail appears in your new home. If only changing your email address was this easy. Whether you're leaving an outdated service, jumping to a new job, or just trying to get rid of that silly username you created in high school, here's how to make the transition to a new email address simple and orderly.
Select the emails you actually keep
First, make sure your new email address is one you'll actually use long-term. This may involve eventually getting your own domain name and associating your email address with your real name. Something like [email protected] has more staying power than [email protected] . This way, you don't have to deal with your email provider or worry about changing your email address again.
It can be daunting to set up, but it's actually easy to get your own domain name and set up email addresses that can be used in a more familiar interface like Gmail (or your app of choice). Having an email address through a domain registrar may cost you a little extra per month for the privilege, but it's a small price to pay for custom emails.
If you don't want to spend money on a domain name, we recommend choosing one of the large free providers like Gmail or Outlook. Basically, you want to avoid using an email address you got from school, an email address your ISP gave you, or your company's email address. Work and school emails are great, but they probably won't last forever. You need something you can always come back to.
As for your actual email address, make it as easy to remember and "sophisticated" as possible. This means avoiding cringe-worthy names like "[email protected]" or "[email protected]".
Instead, stick to some variation of your name whenever possible. You can add some content if it's already adopted by any service you choose, but don't use anything that might be embarrassing or anything that would give away too much personal information about you: your year of birth, your political affiliation, or your Favorite sports team, for example.
Migrate old inbox to new inbox
In many cases, you can easily migrate old emails and contacts to a new email address. We can't cover how to do this with every webmail and domain provider, but here's how you can migrate to a new Gmail account. (The process should be very similar to other services.)
How to migrate your email to Gmail
After setting up a new Gmail account, you can import emails and contacts into the account as follows:
Sign in to your Gmail account and click the gear icon, then select Settings .
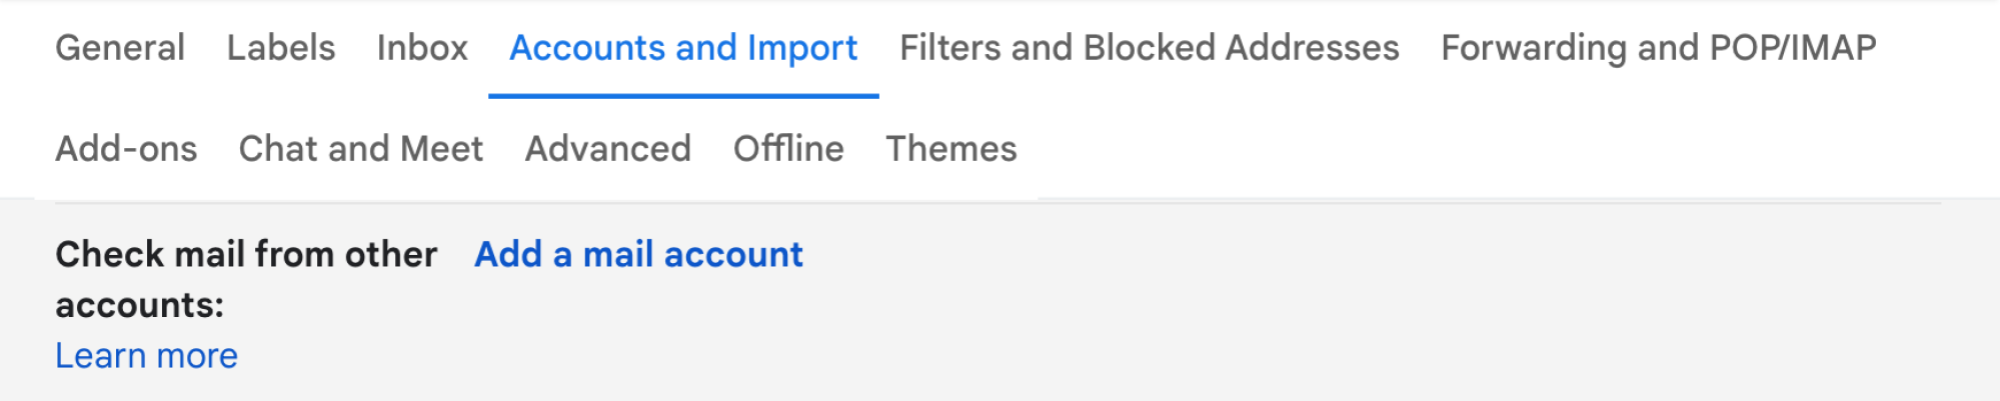
Open the Accounts and Import tab.
In the "Check mail from other accounts" section, select Add a mail account .
Enter your old email address, click Next , make your selections, and click Next again.
Select the desired options (mark incoming messages, always use secure connection, etc.).
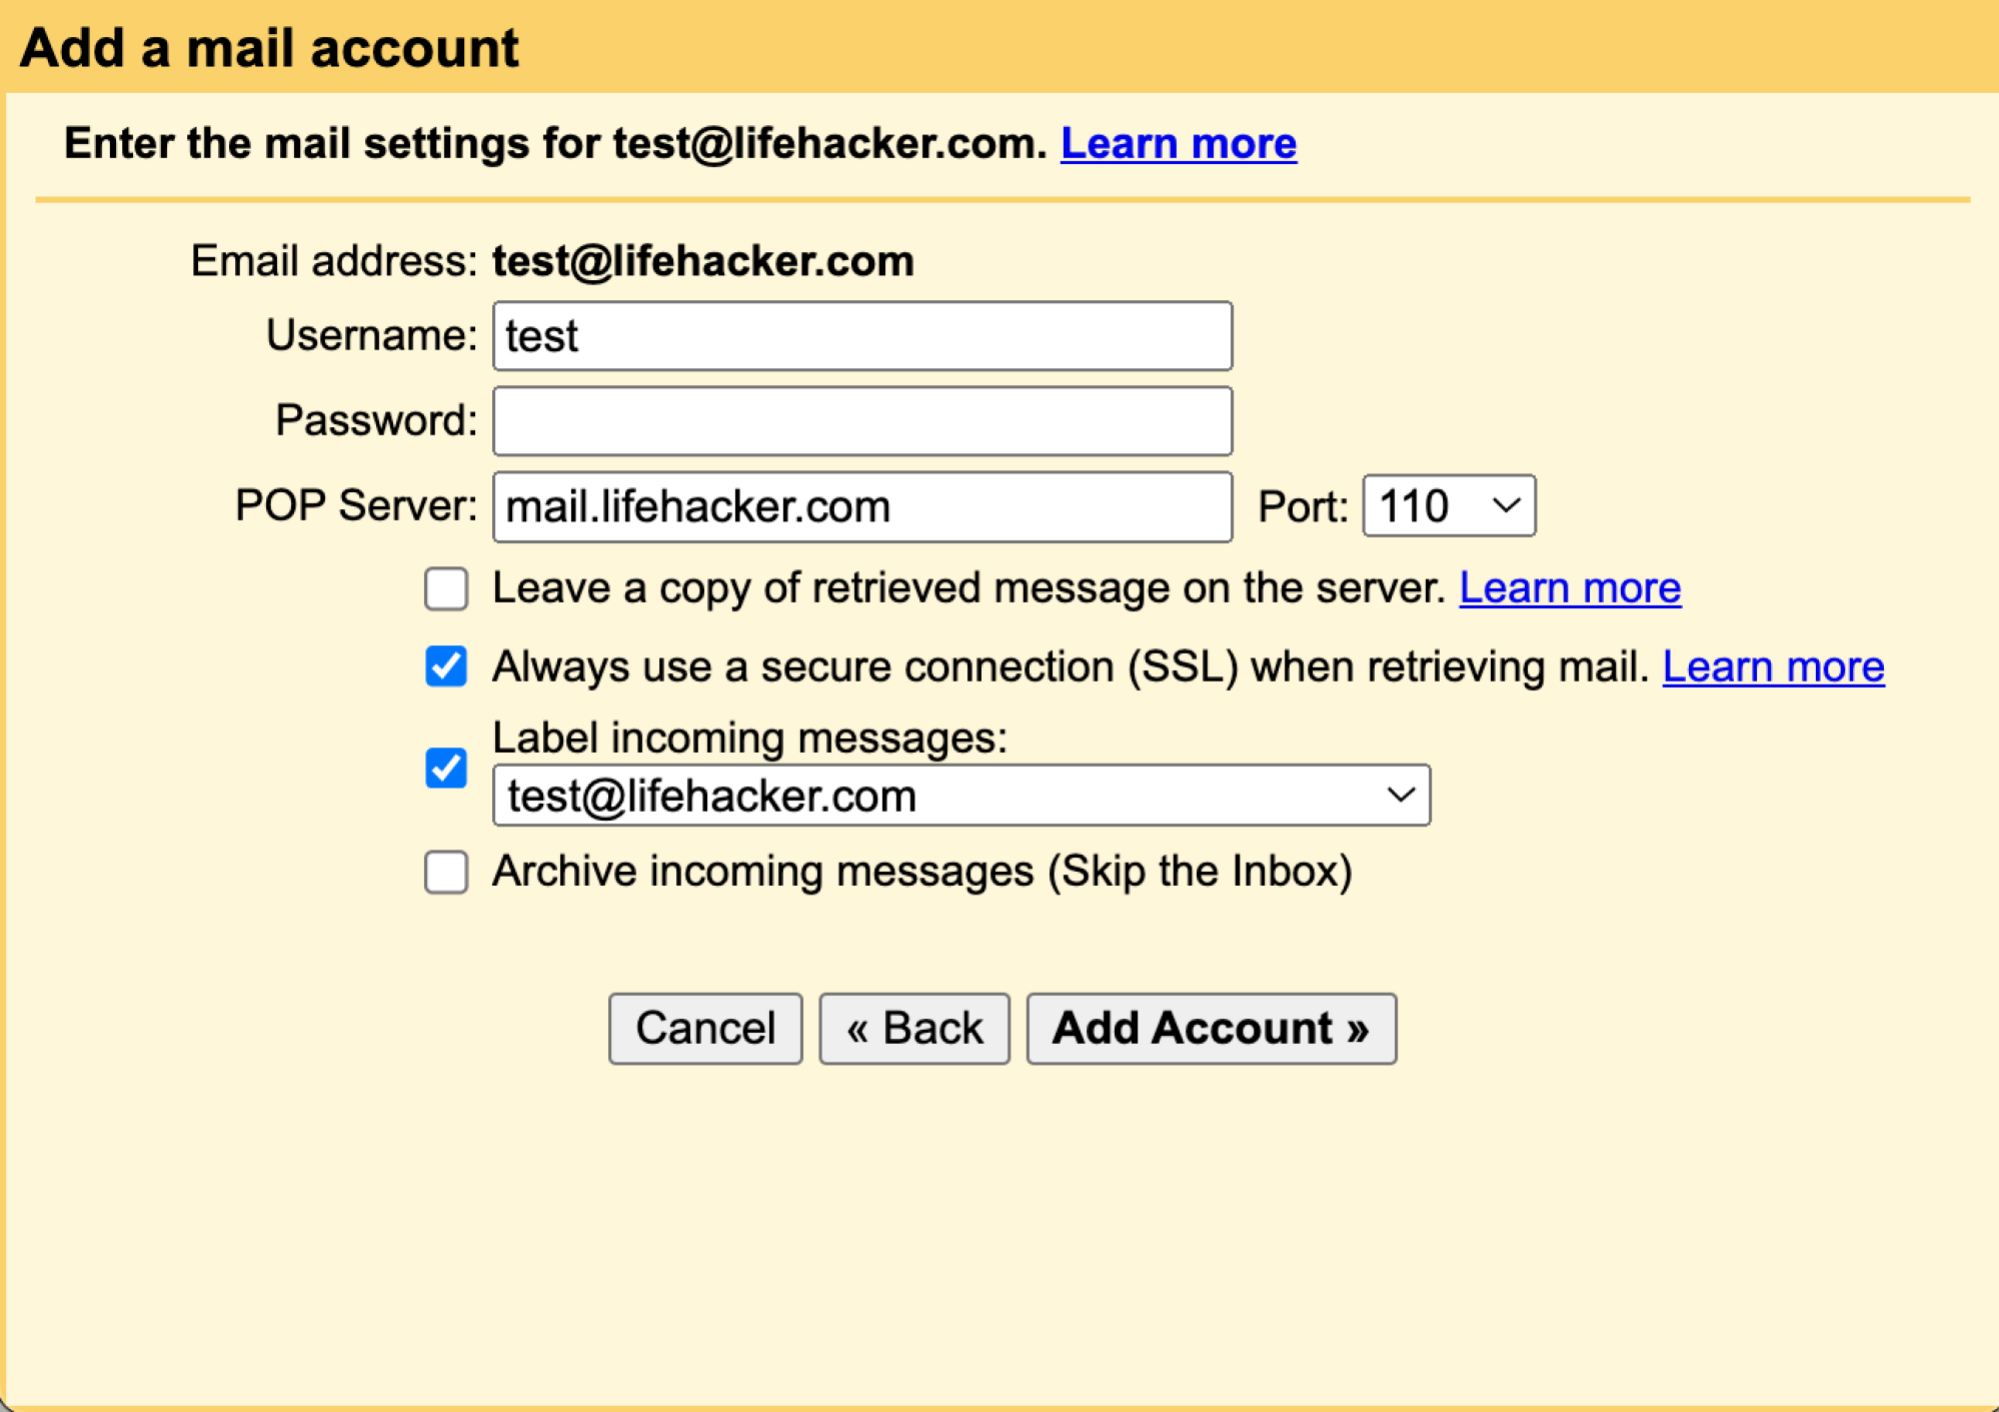
Click Add Account .
All your old emails will now be pulled into your new account. You'll also be notified of any new emails you receive, so you don't need to worry about email forwarding. This process can be a bit slow, so if you need emails sent to your old address quickly, we recommend setting up a forwarding system on your old email account as well (see the next section to learn how to do this).
Gmail also has a separate "Import Mail & Contacts" option to pull the above data from other accounts as well. You might also consider giving it a try.
 How to Conquer Your Email After the Holidays Read More
Keep your old emails alive – set up email forwarding
Next, it's time to set up a system so that anything sent to your old email account is forwarded to your new email account. You'll need to do this on your old email account (if you switched to Gmail, you already set it up in the last step). Every email provider is different, but here's how to set up email forwarding for Gmail and Outlook.
How to set up email forwarding from an old Gmail account
If you switch from Gmail to another service, you'll want to forward these emails to your new account. Here's how to do it:
Open Gmail and click the gear icon.
Select Settings.
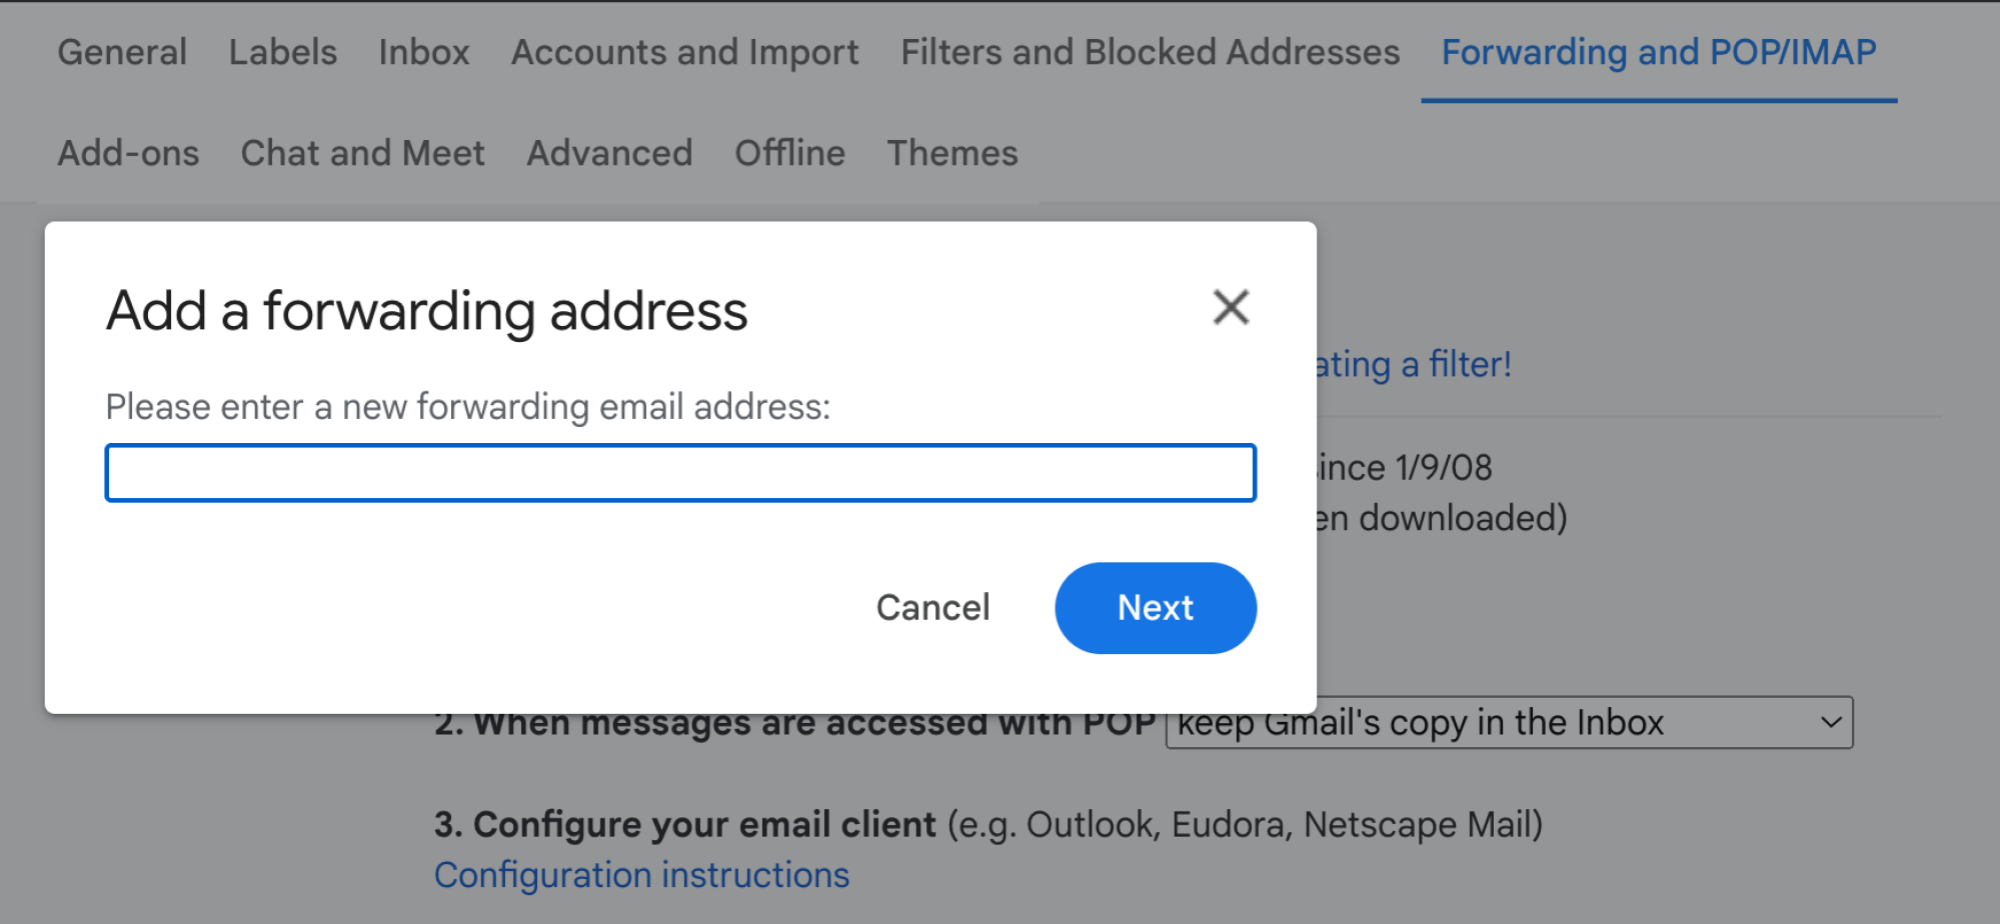
Select the Forwarding and POP/IMAP tab.
Click Add forwarding address .
Enter your new email address.
Click Next > Continue > OK .
You will receive a verification email at your new email address - click the link to confirm.
Refresh your browser and go back to Forward & POP/IMAP > Forward > Forward a copy of incoming messages to to select what you want to do with the Gmail copy of the message.
Now, when someone sends you an email at your old Gmail address, you'll receive the email at your new email address. If you only want to receive selected forwarded emails, you can set up filter-specific email forwarding so you don't carry any spam in your new emails.
How to set up email forwarding from an old Outlook account

Setting up email forwarding in Outlook is easy:
At the top of your web browser page, select the Settings gear icon.
Select Mail > Forward .
Select Enable Forwarding and enter your new email address.
Select Save .
Now, any email sent to your old Outlook address will be sent to your new address.
Update email addresses on all your accounts
One of the biggest pains with using a new email address is that you have to update the information in all your online accounts. This means you need to log in and change your email address anywhere on the web, from Facebook to your bank. No matter where you have an account, it can be hard to remember.
This process is much easier if you use a password manager, which will give you a long list of all the websites you have accounts for. Spend an afternoon logging into each website and updating your email address. And don't forget to update the information in your preferred password manager while you're at it, so it doesn't use your old email address to log in.
If you don't use a password manager, it can be a little difficult to find all of your accounts. The easiest way is to search old emails for phrases like "confirm your email," "unsubscribe," "your new account," or "welcome." This will give you a comprehensive list of sites you have accounts on, email newsletters you subscribe to, and just about everything else.
Tell your friends and family
Finally, it's time to tell your friends and family that they need to update their address books with your new email address.
Depending on the number of people you need to contact and your relationship with them, you may need to send a few different emails to announce your big change: one to your family, one to friends, and one to a business associate. Send an email from your new email address and BCC others on your list so you don't accidentally share a bunch of email addresses that people may not want shared.
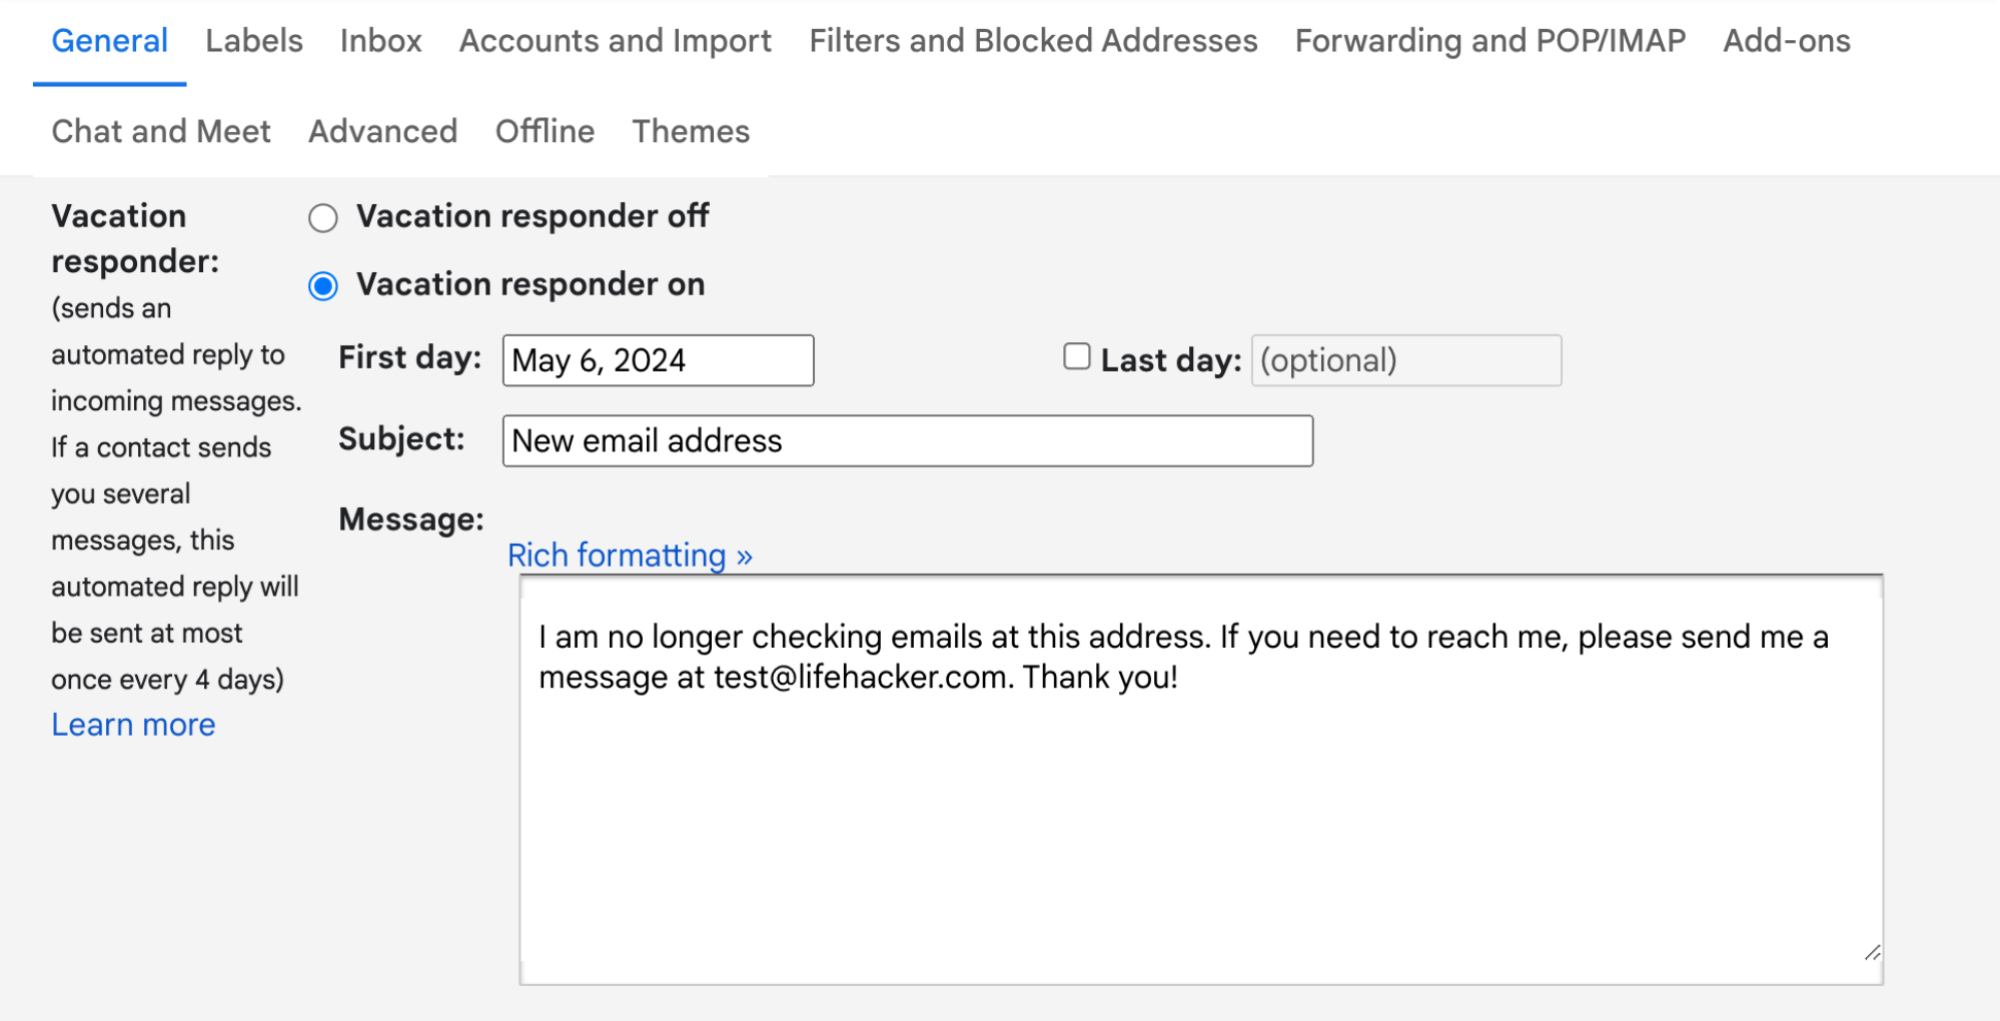
Finally, it's time to add an autoresponder to your old email address and let it disappear gracefully. Simply go into your old account and create an account (also called a holiday responder on some services) with a message telling recipients your new email address.
In some cases, you may need to follow up with your address change email to ensure your initial note doesn't end up in someone's spam or junk folder, but you should now be able to ditch your old email address And move on to stuff that you actually want to keep for a long time.
