For many of us, podcasts are a way to catch up on news or stay entertained while we work out, commute, or do housework. You most likely have a favorite (or seven) that you follow regularly.
While every armchair broadcaster with a recording app is eager to get in on the game, creating a professional-sounding podcast isn't that simple. This guide will tell you how to create, record, and publish your own basic podcast and get people listening.
ready to commit
Before you rush into anything, it's important to remember that podcasting takes a lot of effort to get started. It's easy to think that they're easy to make since most are just audio, but don't be fooled. Putting it all together can take a lot of time, especially when you're just starting out.
Additionally, podcasts that publish consistently work best. If you are interested in developing any kind of listener base, you must be prepared to release episodes on a regular basis. Podcasting may be a fun job, but it's still work and should be treated as such.
 How to Start a Podcast with Abu Zafar Read More
Don’t expect to get rich from podcasting. It's possible to make money from podcasting, but it usually requires advertising, sponsorships, and patrons—all of which are only available after you've built a large enough audience to be valuable to advertisers. If you don't want to start a podcast for fun, or just to have your voice heard, you probably won't get much benefit from it unless you already have a group of eager listeners.
Choose a format
There are a variety of common podcast formats, from co-hosted conversations to interview shows. Which one you choose will depend on factors like your content area and how much editing you want to do, but you need to pick a format and stick with it so your audience knows what to expect. If you're putting together multiple formats, such as a co-hosted podcast where each episode has an interview portion, be consistent as well. Here are some options to consider.
Solo or Monologue Podcast
This format is just you, the host, talking to your audience about any topic of your choice. You can work from a script or outline, or speak off the cuff, but remember that you need to find ways to keep your audience engaged because they will only hear your voice. Solo podcasts may be best for storytellers or those who have expertise in a specific topic and want the flexibility to record on their own schedule.
Co-hosted podcast
Co-hosted or conversational podcasts feature two (or more) hosts conducting an informal discussion about a specific subject or topic. This format is ideal for duos or groups who have a good relationship and have the flexibility to record together.
Interview Podcast
In an interview podcast, you (and any co-hosts) bring a different guest to each episode. This format requires more planning, coordination, and research to record and edit, but it keeps your show engaging and fresh because every episode is different. It helps to have an overarching theme for your show (rather than doing random interviews) so your audience knows exactly what to expect.
Call Podcast
With a call-in show, you can invite your audience to participate in your podcast live or through a recorded message included in the show. Like a talk show, a call-in podcast can feel spontaneous and fresh, but it requires an existing audience (unless you're starting in a different format), and you may want to screen callers before recording.
scripted podcast
Scripted podcasts can be solo or co-hosted podcasts, but the focus is on scripted fiction or non-fiction narratives. Fictional scripted podcasts can be like audio versions of movies, with sound effects, music, and voiceovers, while nonfictional scripted podcasts are typically series or news stories (like true crime). The format can be simple and flexible, but it also requires a lot of research, and the story must engage the audience.
Get the right podcast gear
You can’t start a podcast without equipment, and good equipment goes a long way. This is what you need:
Microphone: Any microphone can be used to record a podcast, but listeners can usually tell the difference between a low-quality and a high-quality microphone. (I use four analog Audio-Technica AT2020s to create my own podcasts). When you're shopping around, you'll also need to decide whether to use a USB or analog (XLR) microphone. USB microphones convert analog sound into digital sound, so you can plug a USB microphone directly into any computer and start recording without much fuss, but the audio quality you get will likely be lower compared to analog sound. Since you don't need any additional tools or equipment to record with USB microphones, they may be cheaper in the long run.
Analog microphones use XLR connectors, which means you need another device to stream the audio to your computer, but you get higher audio quality and can use them with other sound equipment (if you have a PA system or want to To play live music, for example).
Of course, if you have a gaming headset or other basic microphone, you can easily use it for podcasting as well, as long as the quality is decent. This method doesn't work well if you're co-hosting or planning to invite regular guests, as you'll need multiple microphones to capture everyone's voice.Portable XLR recorder (optional) : If you plan to use an analog microphone in your podcast, you'll need a device that can capture analog audio and convert it to digital audio. The portable XLR recorder can capture multiple microphone channels and allows you to make basic sound level adjustments and muting on the fly. Your audio files are automatically organized and stored on a memory card, which you can insert into a card reader or a slot on your computer.
These are great tools, but they can be expensive. You can find them for between $100 and $500, depending on the number of channels and options you need. (I use a Zoom H6 handheld recorder with four available analog channels.)Audio interface (optional) : An audio interface is required if you want to record directly to your computer using an analog microphone. These devices allow you to plug in one or more analog microphones and convert analog audio to digital audio. Most audio interfaces will connect to your computer via USB or USB-C. Audio interfaces can cost as little as $30 or as much as $300, depending on your needs.
Computer: Any Windows or Mac computer should work fine for recording, editing, and uploading podcasts. Thankfully, editing audio doesn't require a lot of computing power. Additionally, your computer will need the correct ports depending on how you choose to record (directly to your computer or to a dedicated recording device). For example, a USB microphone obviously requires an open USB port. If you're using an analog microphone with a portable XLR recorder or audio interface device, you'll need a 3.5mm audio input jack, a USB/USB-C port, or in some cases a FireWire port. Before you spend money on a device, make sure you have a computer that can support it.
Audio editing software: For the actual recording and editing, you'll need a digital audio workstation (or DAW). There are many good options, but most licenses are not free. Professional-grade DAWs like Reason range in price from $99 to $599, depending on the features you want, while Pro Tools starts at $99 per year. Hindenburg offers audio editing software licenses starting at $12 per month, Reaper, a fully loaded audio production application, sells for $60, and Adobe's audio editing software Audition CC has a subscription fee of $22.99 per month.
As a beginner, you probably shouldn't start investing money into podcasting software. So when you're first getting started, most people will recommend a free open source program like Audacity, which is the example we'll use in this guide.Pop filter (optional): The clearer the audio sounds, the better. Pop filters, while not required, are fairly inexpensive and can prevent plosives from making an annoying sound in your recordings. If you don't want to buy anything, you can easily make some yourself.
You might be thinking that all this equipment is quite expensive, and you'd be right. However, remember that quality audio equipment will last forever if you take good care of it. It may be expensive at first, but after the initial purchase, you'll be ready.
Narrow your topic and find your niche
There are tons of podcasts out there, which means you can probably already find one about everything under the sun. Don't lose heart! While almost all the broad topics are covered, you just need to find your own ideas to turn old ideas into new ones.
For example, if you want to create a podcast about music, ask yourself if there is an audience that would enjoy what you want to talk about. Maybe you narrow your ideas from music in general to bluegrass music specifically. Now your coverage is specific: bluegrass music, people and culture.
Once you've narrowed down your topic, it's time to add some spin to it. Maybe you can talk about bluegrass music and culture while drinking moonshine with your host. It's true that everything has been done before, but not everything is done your way. Find an interesting and engaging angle – the more your podcast reflects your passion, the more likely you are to keep listening.
Download, install and set up Audacity
As mentioned before, Audacity is a great DAW for beginners in podcasting. It's open source, free to use if you want, and available for Windows, macOS, and Linux. Before you start recording, there are a few steps you need to take to set everything up correctly:
Download and install Audacity.
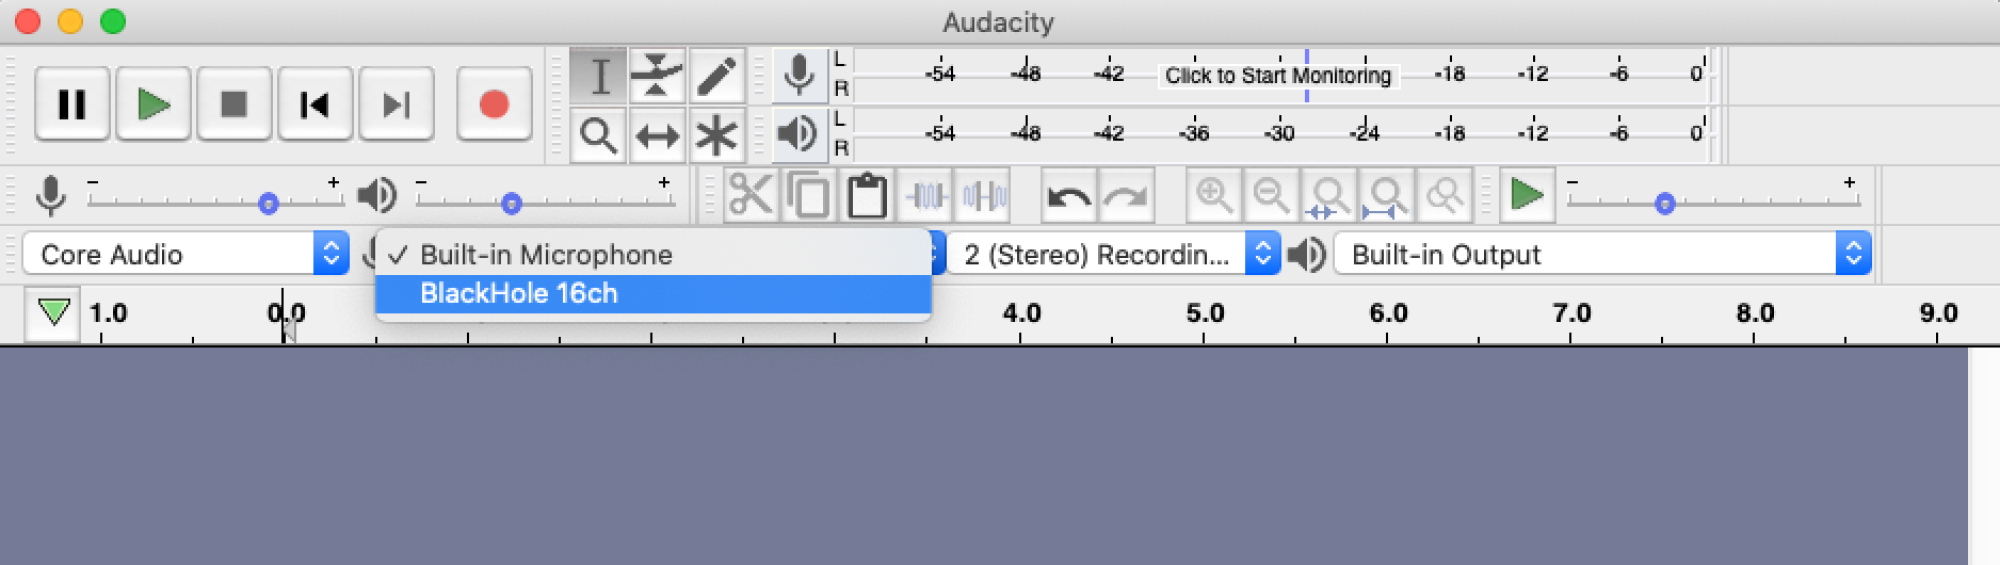
Connect the microphone and open Audacity.
See if Audacity recognizes your microphone by checking the drop-down menu next to the little microphone icon. If you see the microphone, select it.
In the upper left corner, you should see buttons for pause, play, stop, rewind, fast forward, and record. Click the record button and speak into the microphone to make sure it's working.
Stop recording and play back what you just recorded to make sure everything sounds good.
Please note that previously you had to download the LAME MP3 encoder to export files to MP3. LAME is now built into Audacity for Windows and Mac. If you are using Linux, follow these installation instructions.
Record and edit your podcast in Audacity
Recording in Audacity is easy, but there are a few things you should do before starting your first show:
Connect the microphone and quickly record in the same way as before to check the audio levels.
You can adjust the recording volume using the slider just above the drop-down menu for selecting your recording device.
Once you've found a good level, click the little X in the top left of the track to delete the recording test. You don't need it anymore.
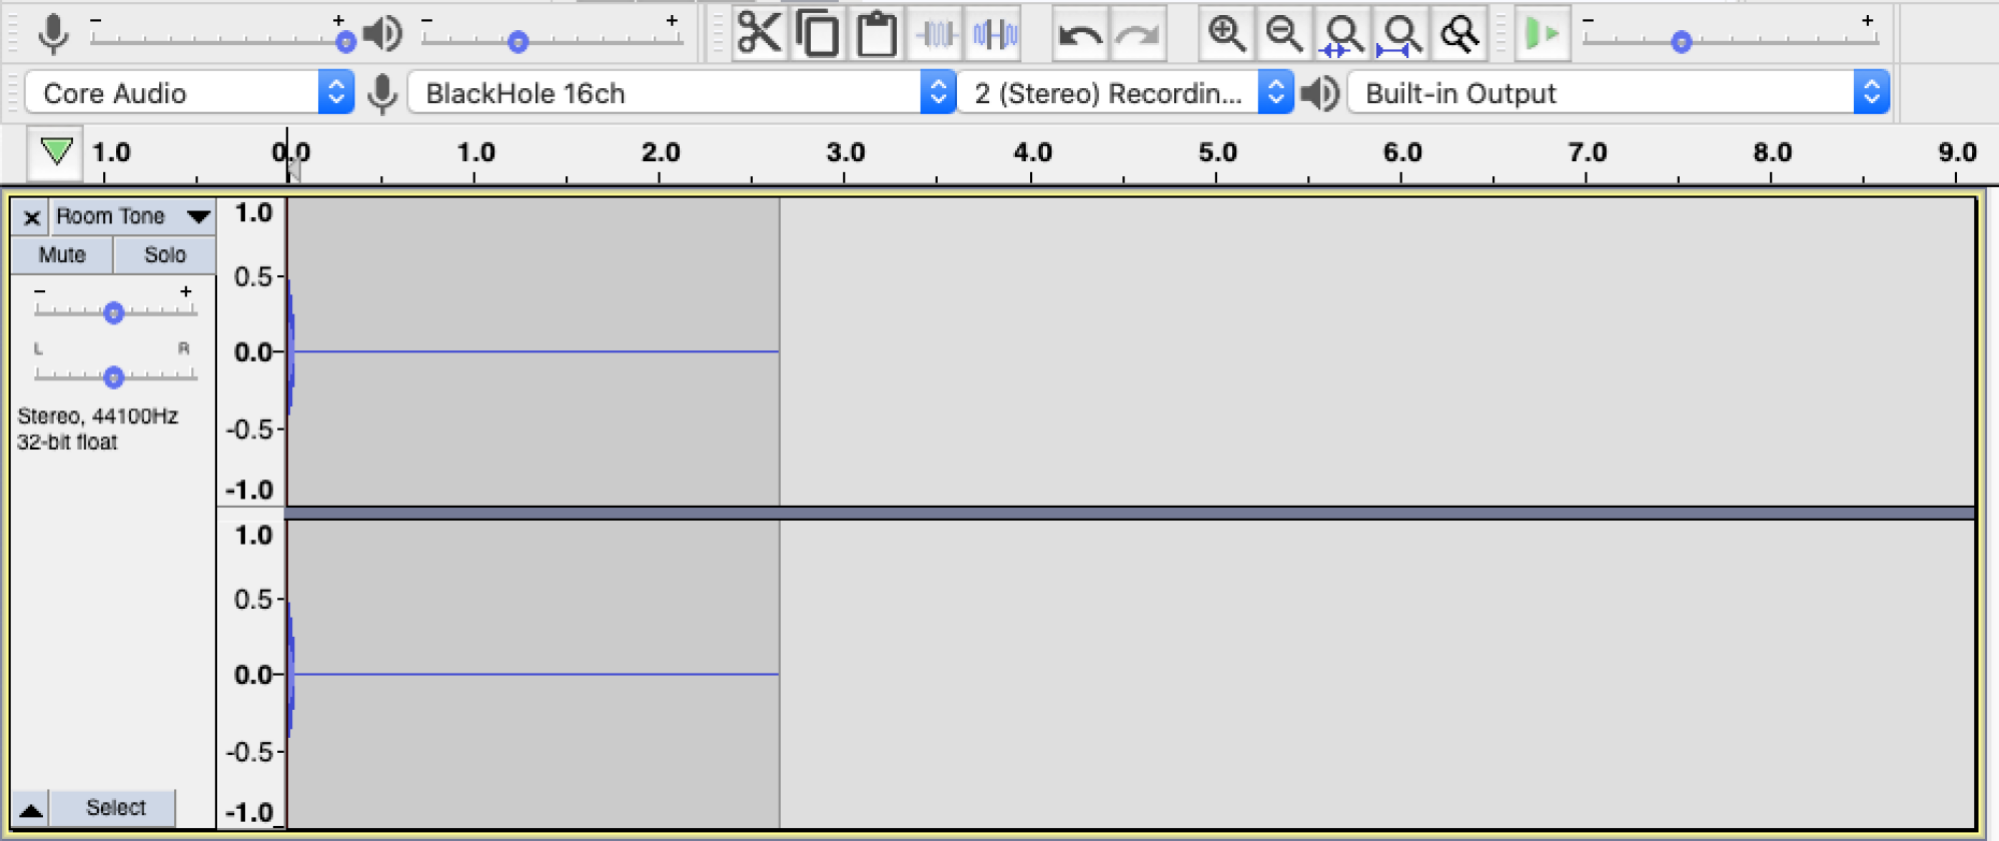
Make sure the recording space is quiet and record about five seconds of "silence." This is called room tone, and you can use it to mask background noise when recording real sounds. You can now mute a track by clicking the mute toggle button to the left of the track. You can also minimize a track by clicking the arrow in the lower left corner of it.
Go to File > Save Project > Save Project As and choose a name for your project. Remember, this won't export any audio, just save your progress.
 How to start a podcast: Prepare for your first episode Read more
Now you're ready to actually record the main part of your podcast. Click the record button and Audacity will start capturing audio in a new track. When the recording is complete, press the stop button. It's that simple. Before continuing, be sure to save your work.
How to add intro and outro music
Writing and recording your own theme music will be very difficult (and probably won't sound very good) if you don't know what you're doing. Leave it to the professionals, you can find free music on any website that offers music under an Attribution International License or an Attribution-NonCommercial International License, such as the Free Music Archive:
Browse music by genre or search.
Find a track you like and click the down arrow to download it.
It may take a while to find what you're looking for, but when you do, all you have to do is credit the creator in the podcast description.
Now it's time to add the music and make the necessary edits:
Go to File > Import > Audio . Find any music you want to use in your podcast and click Open. The music will be placed into Audacity as its own independent track.
Find the Selection tool in the Audacity toolbar. (It looks like a typing cursor.)
Drag the selection tool over the part of the music you want to use for the intro and outro music.
With the section of music currently selected, find the Trim Audio button on the Audacity toolbar and click it. You should leave only the musical part of your choice.
While that section of music is still selected, find the Copy button on the toolbar and click it (you can also use CTRL+C or Command+C ).
On the same music track, click anywhere to the right of the music section. Then find the Paste button on the toolbar and click it (or CTRL+V or Command+V ). Now you have your intro and outro music, but you're not quite ready yet.
Using the selection tool, select a copy of the music. Then go to Effects at the top and select Fade . Do the same for the other music copy, but select Fade In. Your intro and outro music is now ready.
How to edit certain audio clips from a podcast recording
If you need to remove something from your podcast (for example, remove profanity if you want to keep it clean), or remove information that shouldn't be made public, it's easy to fix:
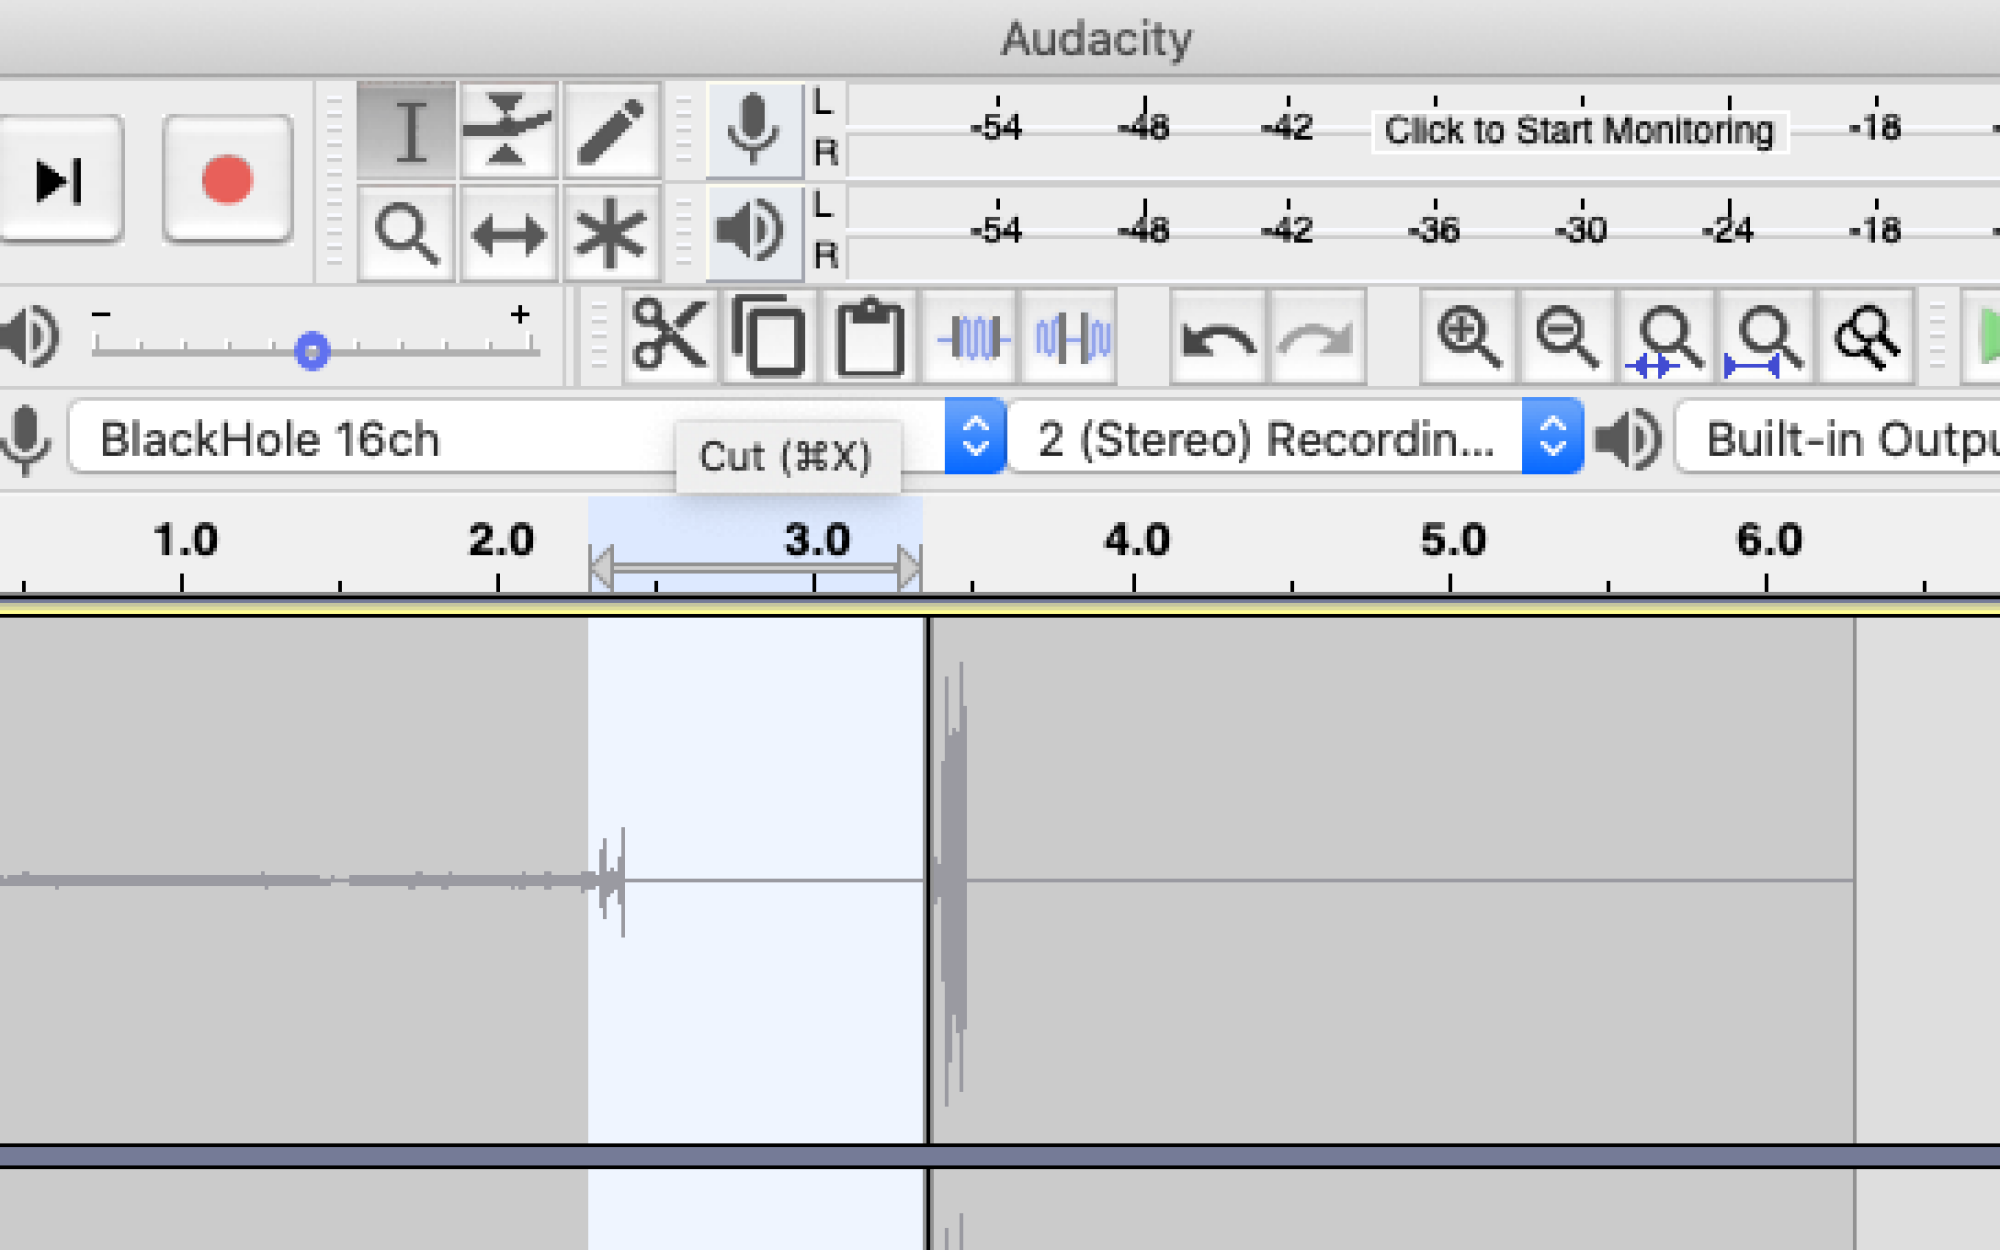
Find the part of the audio you need to cut.
Use the selection tool and highlight the entire section you want to delete.
Find the Cut button on the toolbar and click it. Boom, gone. (Alternatively, you can use the Mute button.)
Remember the room tone you recorded earlier? You can copy part of it and overlap it with the cut part so you can have less harsh silence.
Once you have your music ready and made the necessary edits, you can now align everything using the Time Shift tool (two arrows connected by a thin line). Simply slide each piece of audio into its own track until you're happy with how everything is arranged. You may need to experiment a bit to find the sweet spot.
What if my podcast sounds terrible?
If you feel like your audio doesn't sound as good as you'd like, there are some adjustments you can make. For example, you can use Audacity's compression and EQ settings to make your sound sound closer to broadcast quality. The best way to use compression and EQ settings is probably several articles away, but this video from VoiceOverMaster gives a quick overview of how to use them in Audacity.
How to use artificial intelligence to edit your podcast
There are some artificial intelligence tools you can use to edit and produce podcasts, which may take away some of the hands-on work that podcasting has traditionally involved. For example, Descript is an AI editor that can transcribe your recordings, remove background noise, detect and correct annoying filler words, and dubbing. Other tools such as Cleanvoice.ai, Podcastle, Resound, and Adobe Podcast have similar capabilities. Otter.ai can transcribe audio files and recordings via Zoom and Google Meet, while tools like Dubb offer AI-generated transcriptions, show notes and newsletter content.
You can even use AI to create scripts or generate interview questions for guests, although you'll also need to review and modify anything the AI writes before recording.
Optional: Use multiple microphones or Skype recording

Why use multiple microphones for recording? For one, it makes it easier to fix someone's audio, either on the spot by adjusting microphone levels or later when recording multiple tracks simultaneously.
However, even with multiple USB microphones , Audacity can only recognize one audio input for recording at a time. The Audacity team did come up with several ways to get around this limitation:
Windows: To use multiple USB microphones on Windows, you can use software like Voice Meeter (free) or Virtual Audio Cable to aggregate them all into a single recording device. (The trial version supports up to three devices.) Audio from each microphone is picked up well, but all levels of tweaking must be done through software. In Audacity, you still only see the individual recording tracks you want to edit.
macOS: In macOS 10.7 and later, you don't need any additional software to set up an aggregated device. Check out the official instructions for Apple's converged devices here.
If you use multiple analog microphones , there are two ways to do this:
Use an audio interface device or mixer connected to your computer.
Record everything with a portable XLR recorder and upload the files to your computer.
You'll need one of these devices to use the analog microphone anyway, so if you have a device that supports multiple microphones, you're all set.
What about Skype, Google Hangouts, or other internet calling services?
Audacity doesn't directly support Skype recording, but the Audacity team has provided some methods you can use to bypass it on Windows and macOS.
Otherwise, you have to use other software such as MP3 Skype Recorder and import the call audio into Audacity just like you would import music or other audio files. Once in Audacity you can adjust the levels and make sure everything sounds good. While Audacity is powerful (especially being free), it certainly has its limitations, so if you really enjoy podcasting, it might be worth investing in a better DAW in the future.
Tag and export MP3 files in Audacity
Exporting your podcast to an MP3 file should be easy since you set up the MP3 export before you start recording. However, there are still some important things to remember when exporting.
First, you need to edit the file's metadata (also called its "tags"). Metadata is information that appears regardless of the file name and includes things like title, track number, album and artist name. Fortunately, Audacity allows you to do this when you export your audio to MP3:
Go to File > Export > Export to MP3 .
Select MP3 files in the "Files of type" drop-down menu. Then name the file (for example, your podcast name and episode number). Click Save.
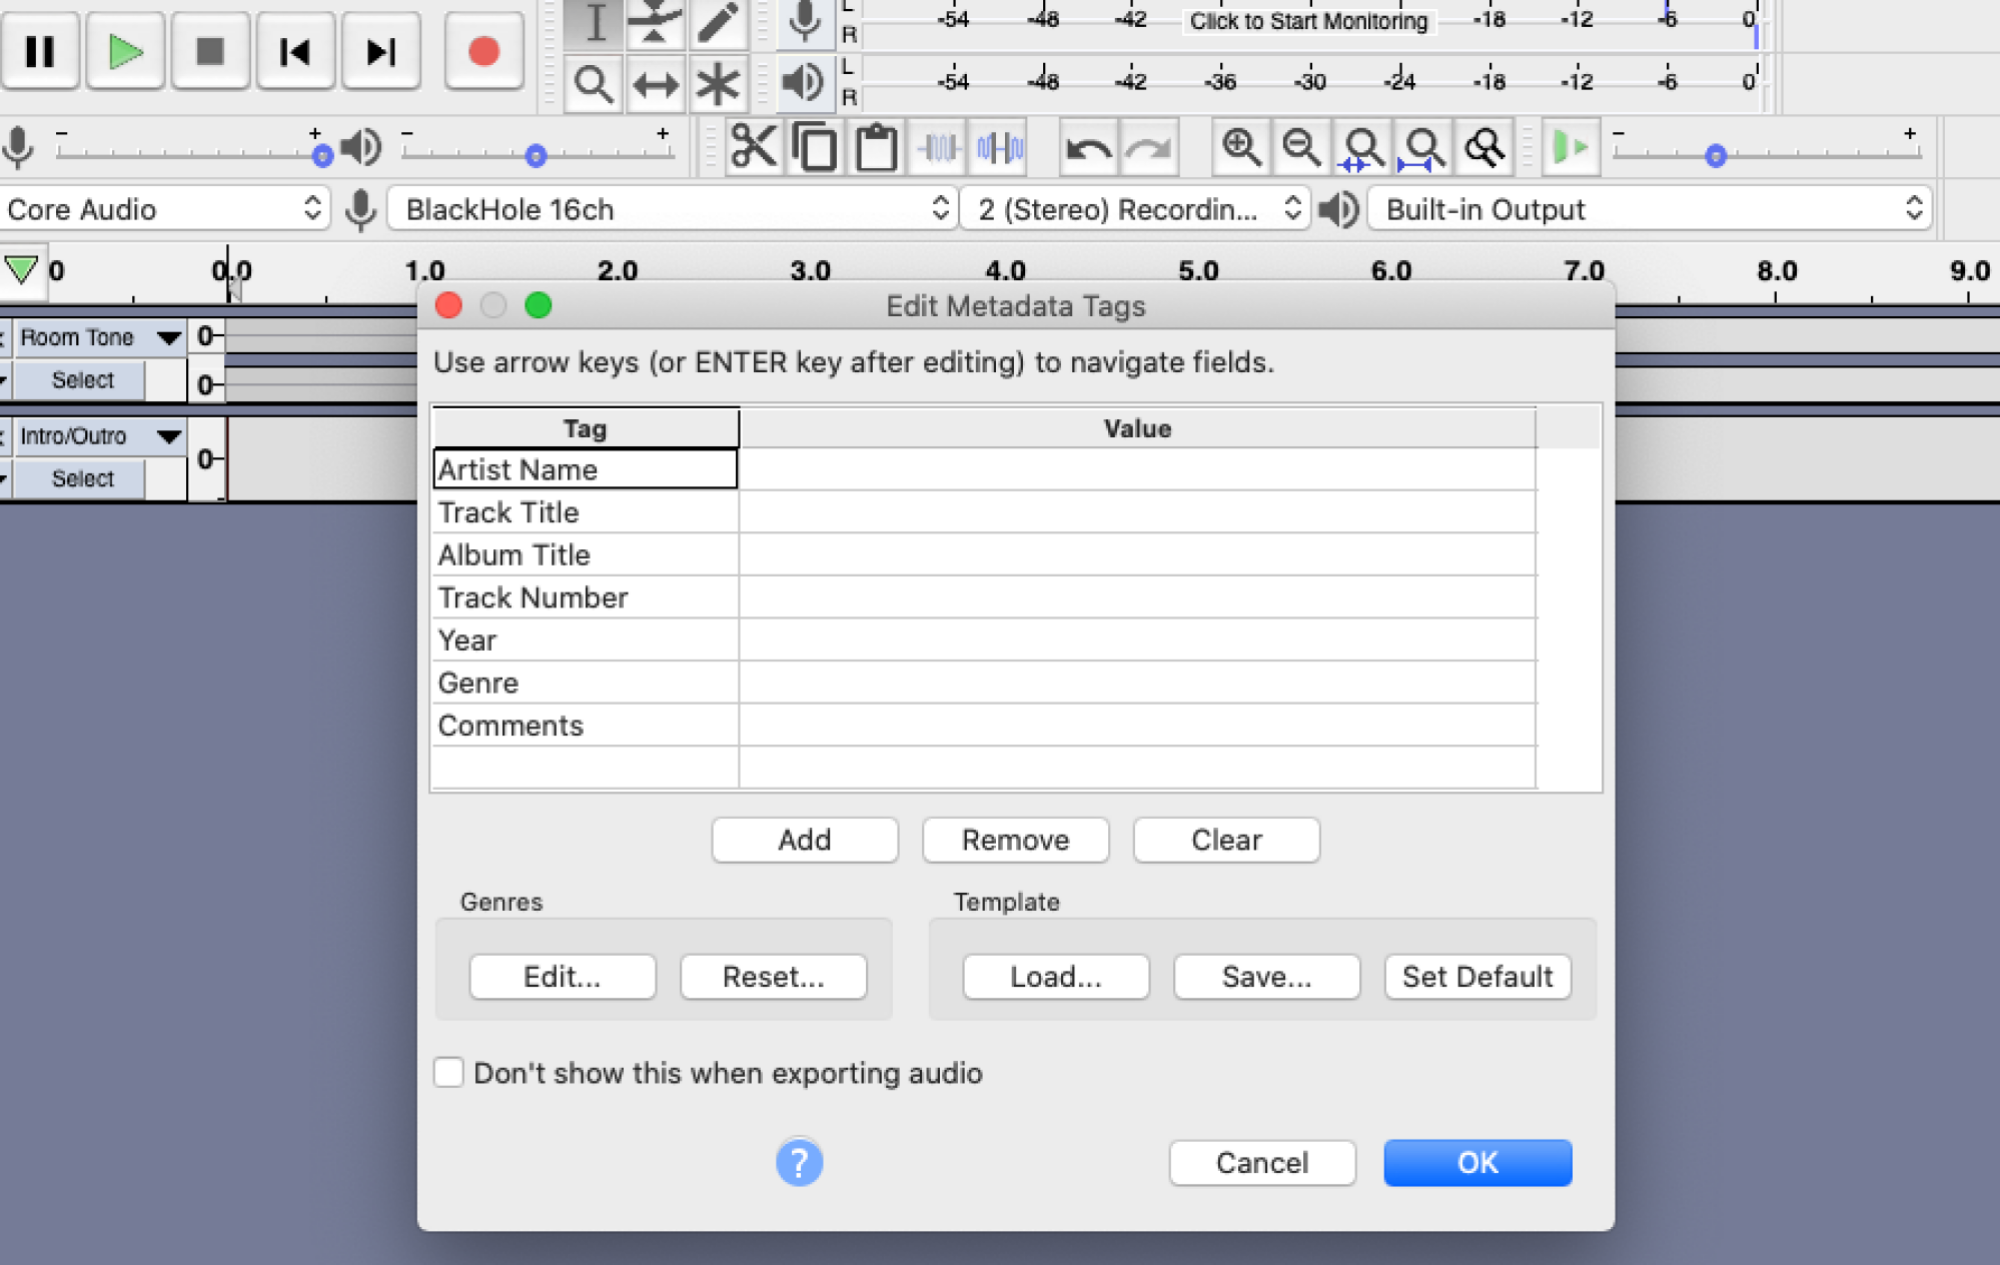
Now you will see the Edit Metadata Tags window. Enter all the necessary information (which we will discuss shortly). You can also add and remove sections here as you see fit.
Go to the Templates section and click Save. Save this template for future episodes so you don't have to fill out most of the information again.
Click OK. Your MP3 should be exported and ready for upload.
If you're not sure how to fill out the metadata template, Daniel J. Lewis of The Audacity to Podcast has some suggestions:
track:
Your episode number. This will help sort the episodes chronologically if players don't read the release or revision dates.
title:
Your episode number and title, just like your blog post. For example, "AYJW027: Brave (2011)".
artist:
The showrunner's name or your network's name.
Album:
The title of your podcast (remember, this is your entire show, not just individual episodes).
Year:
Release year.
type:
Choose the most appropriate "podcast".
Comment:
A short summary of your episode. This could be the same as your WordPress excerpt, or just the URL of your show notes.
copyright:
Your copyright information. I recommend writing something like this: "© 2011 D.Joseph Design" - note that the "by" is not required and the symbol should always precede the year. Not all tagging programs have this feature.
URL:
Your Shownotes URL. Not all tagging programs have this feature.
Cover/Picture/Album Art:
Your podcast cover art…
Metadata is very important when you later want to list your podcast in a directory, so take the time to make sure you have as much information as possible.
Optional: Add podcast chapters
Podcast chapters are a great way to give users more control over their listening experience. For example, your podcast might cover a variety of topics, or you might want to make it easy for listeners to access your various sections. This isn't required, and few podcasts use this feature, but if you want to showcase your work more polished, podcast chapters can certainly help.
Podcast chapters work like chapters in a book, letting you "skip" certain segments of an episode (such as the introduction), or skip past segments that aren't of interest to you. You can even add images to your podcast section to tie the picture to the discussion or content. Use it to present more information about a topic. Unfortunately, adding them manually can be complicated and time-consuming. To save you the trouble, use software that adds chapters:
Windows : The free software application Chapter and Verse allows you to add podcast chapters along with other metadata such as images and chapter notes.
macOS: The Podcast Chapters ($19.99) app makes adding chapters on your Mac super easy. If you're working on multiple podcasts, you can save podcast presets, adjust playback speed to help you find episode markers faster, and add images.
Choose a catchy name and create a cover art image
When people find your podcast, the name you choose for it matters. John Lee Dumas, host of the Entrepreneurs on Fire podcast, recommends choosing a name that accurately conveys what your podcast is about to your listeners.
If we go back to the bluegrass and moonshine example, it could be something simple, like Bluegrass and Moonshine , or something less obvious but still getting the point across, like Sippin' and Singin': The Bluegrass Podcast . The title gives you an idea of what your show is about, but more importantly, your show might show up when someone searches for a podcast about bluegrass music.
You'll also need to provide images for your podcast. It's the first thing people see when they see your show, so it should look good. An image is also needed to list your podcast in directories like iTunes, Stitcher, and BluBrry, as well as podcast managers like Pocket Casts and DoggCatcher.
Cover art can be a photo or a custom piece of art, depending on how you want your show to be presented. If the show is about you, you can even use a good photo of yourself. You can use a simple logo if you want, as long as it relates to what you're talking about on the podcast. You want to make sure your images convey the true meaning of your show as much as possible.
Whatever you choose to use as your cover art, make sure the show's title is on the image. If you're not comfortable making images yourself, don't be afraid to hire a designer from a service-oriented website like Fiverr or 99designs to make the images for you.
Podcast images also need to be of a certain size, otherwise your work won’t look as good when scaled down. In fact, some directories won't even accept podcast feeds if your artwork isn't the right size. Here are the essentials if you want to shoot:
Image must be at least 1,400 x 1,400 pixels
Images must be in .jpg or .png format (.jpg preferred)
Image should look good and readable at 300 x 300 pixels
A good rule of thumb is to optimize your image to 150 x 150 pixels. If it looks good this small, you know you won't have any problems. Daniel J. Lewis of The Audacity to Podcast also recommends that you treat certain types of images differently so that they always look their best:
For photo/image based artwork, get the largest version possible and design within its dimensions.
For color- or illustration-based artwork, design in a vector editor such as Adobe Illustrator to create artwork that can be scaled to any size without losing quality.
You can easily do most image editing in Photoshop or alternatives like GIMP and Pixelmator. When you have a good name and some decent artwork that represents your show, you're ready to start recording.
Find a place to host your podcast
Once you've finished tagging and exporting your podcast, it's time to find a place to host your MP3 files. It's crucial to host your podcast so you can start distributing your show to podcast directories and apps. Here are some of the best options for beginners:
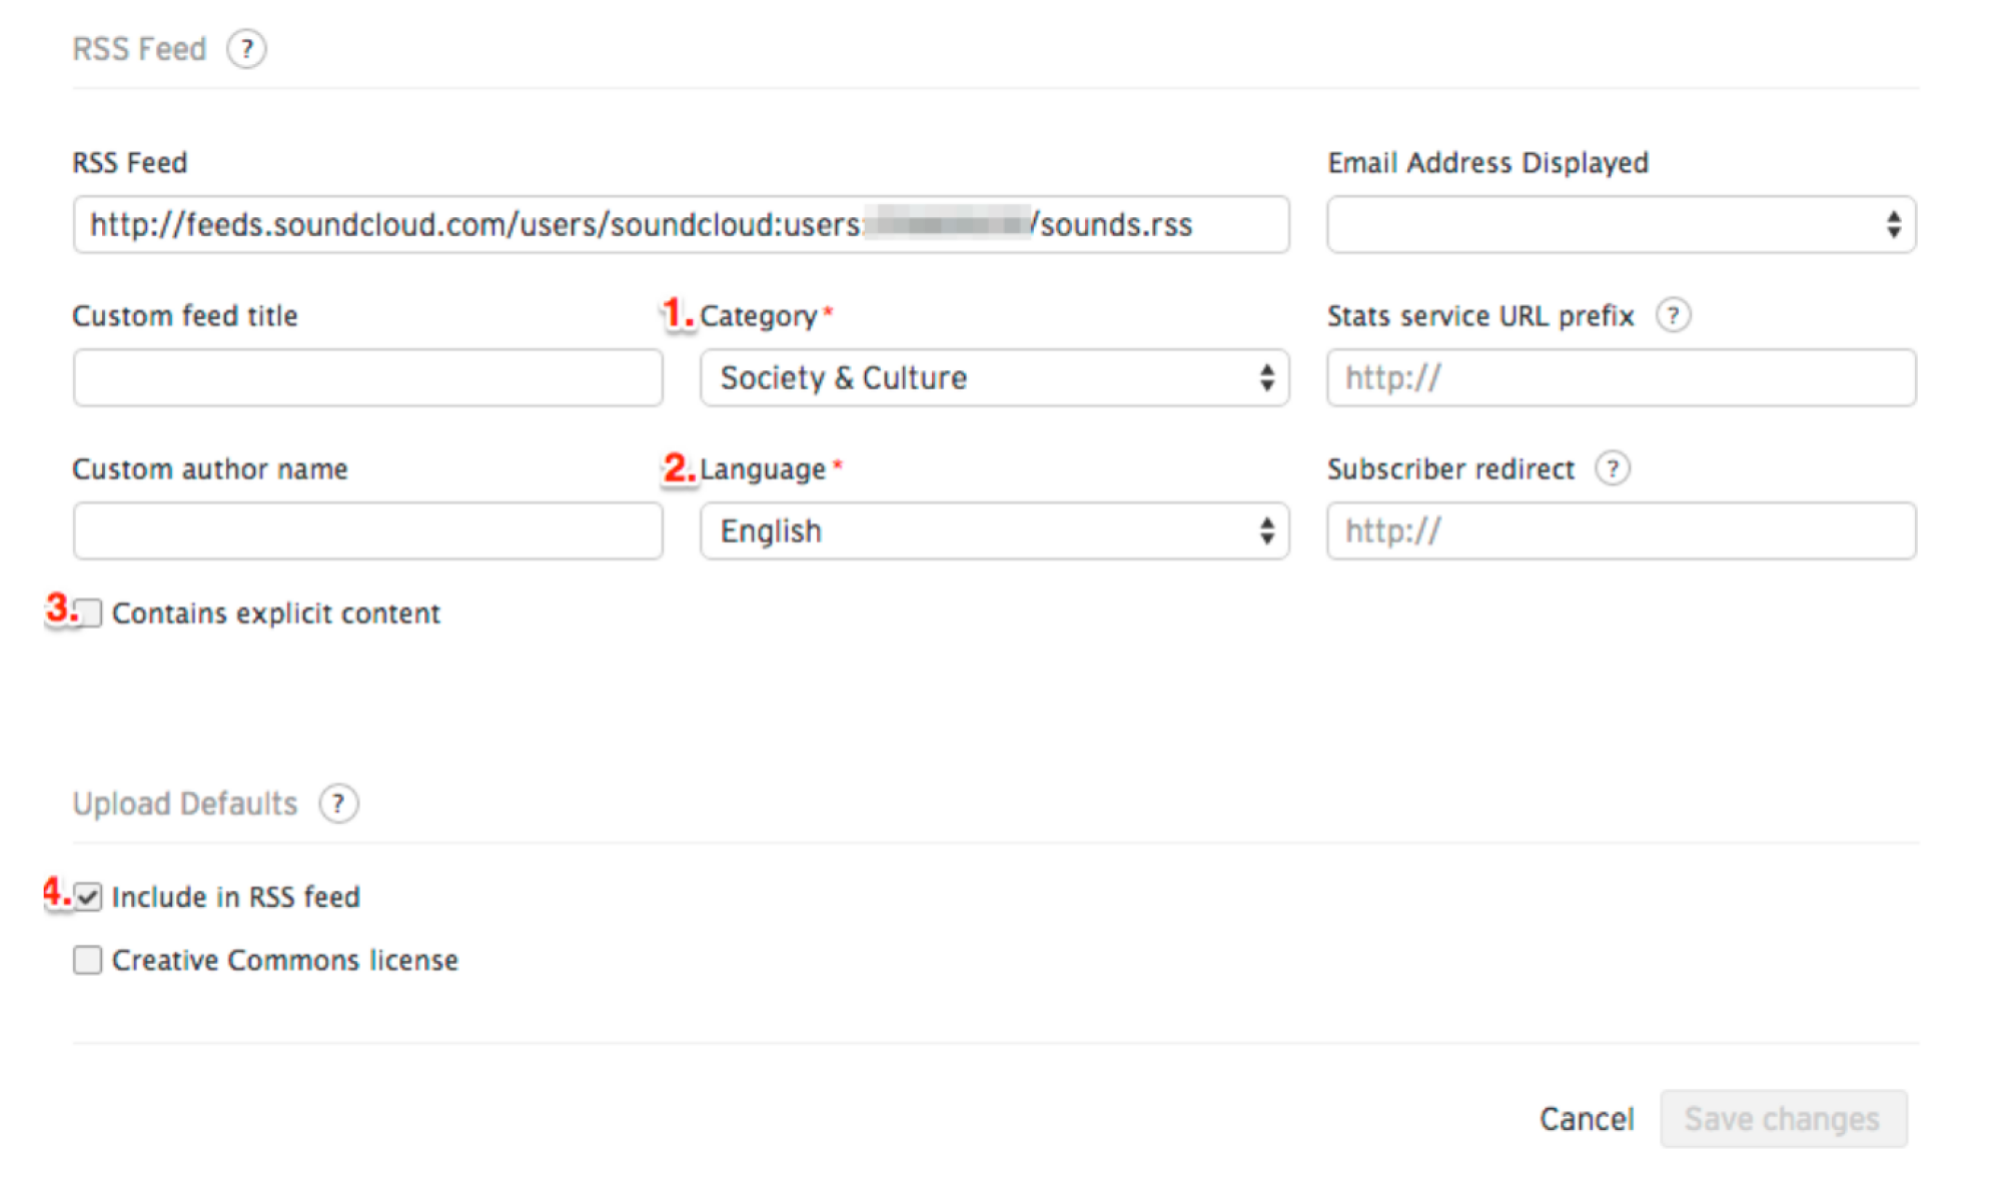
SoundCloud : SoundCloud offers free podcast hosting (plus two competitive paid options for when you get a little more serious) and allows you to distribute your podcasts via RSS. Your podcast will be published instantly to SoundCloud itself, which makes it very easy to share your podcast on social media, blogs, and other sites.
Podbean : Podbean offers multiple tiers of hosting, including a free option (although free hosting is quite limited). The service has its own iOS and Android apps for listening, as well as analytics tools, but you'll need to pay to get most of its best features.
Podomatic : Podomatic is very user friendly. It offers free hosting for podcast beginners and provides ample bandwidth and storage space. There's also a pro option that offers more bandwidth if you find you like it.
Libsyn : Libsyn is one of the oldest dedicated podcast hosting sites and is considered one of the best. Their lowest priced plan is $5 per month with unlimited bandwidth, unfortunately there is no free option.
Amazon S3 : Amazon's hosting service offers a free plan, but it limits your storage (among other things). Paid services only charge you for the storage and bandwidth you actually use, which means costs can rise as your podcast grows in popularity.
Fireside : Fireside is a newer podcast hosting platform from the creators of 5by5 Podcast Network that offers unlimited storage, downloads, episodes, analytics, and podcast websites (custom domains supported) for $19 per month. Each additional podcast costs an additional $8 per month. You can easily import old podcasts from any valid podcast RSS feed, in addition to other hosting sites like Soundcloud, Squarespace, and Libsyn. It also makes small details like chapter markers and metadata more accessible. If you've mastered a few episodes and want a better experience for yourself and your audience, give it a try.
If you're new to podcasting or hosting media files online in general, try a free service and see if you like how they work. When you find a podcast you like, it's worth paying for hosting if you really want to continue podcasting. Each host listed here will give you simple instructions on how to upload your podcast audio files, but no matter which service you choose, there are some basic steps to follow:
When you sign up for the service, use your podcast name (or the closest name to it).
Upload a cover image of at least 1,400 x 1,400 pixels.
Fill out all sections of your profile, especially the description of the show.
Upload your MP3 file. Most hosting services allow you to listen to podcasts within your website, so give them a listen to make sure everything sounds good.
The metadata of the file you created earlier should be filled in with a lot of the necessary information. However, if something doesn't look right, now is your chance to make changes and fix it before submitting your RSS feed to any directory.
Once you're happy with how everything looks, you can verify your feed and submit it to podcast directories.
Listen to Apple Podcasts
You can submit content to many podcast directories, including Stitcher, Blubrry, and Miro. However, most podcasters will tell you that if there's one directory you should try to list, it's Apple Podcasts because it's the most popular and has the greatest reach. Here's how to get listed in the Apple Podcasts directory:
Examine the title, author, description, and cover art associated with the podcast audio file on the hosting service. Apple Podcasts uses these fields for search. For more information and tips, check out the official Apple Podcasts specs here.
Find your podcast RSS feed URL and copy it.
Make sure your podcast RSS feed is active. Some hosts have built-in validators that will determine if your feed is valid. Otherwise, paste your feed URL into the Cast Feed Validator and see what podcast apps and directories see. Make changes at the hosting site as needed.
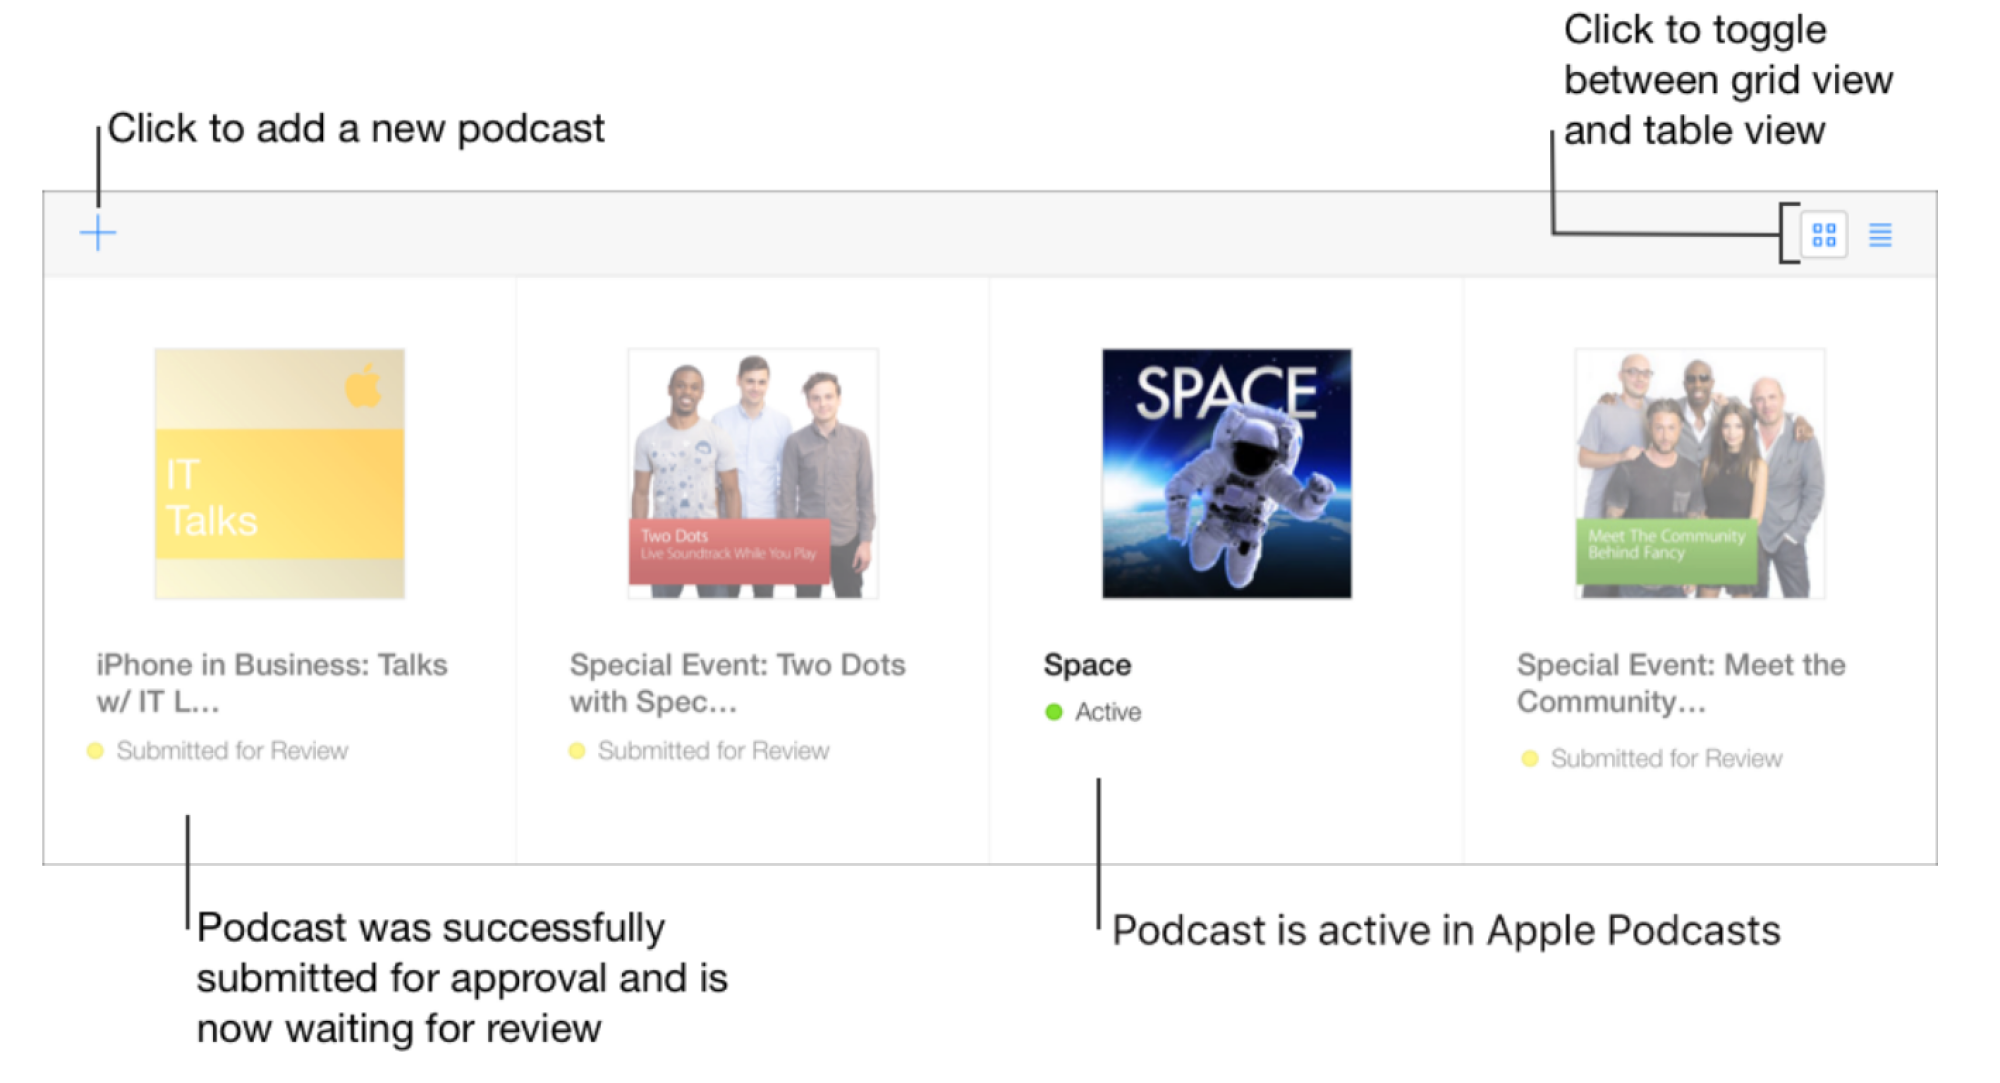
Sign in to Podcasts Connect using your Apple ID. First, you must test and verify your podcast by adding an RSS feed (click the "+" sign to add it, then click "Verify").
Preview your podcast and fix any errors.
Once your RSS feed is verified, you can submit it for review for publication. Track the status of your podcasts on the Podcasts Connect dashboard.
It should be possible to do this. If you don't see anything in Apple Podcasts right away, don't stress. Adding a podcast can take anywhere from 24 hours to two weeks because your podcast must first be reviewed by a team of people. Luckily, the process for listing in other podcast directories isn't too different, so once you figure out Apple Podcasts, the sky's the limit.
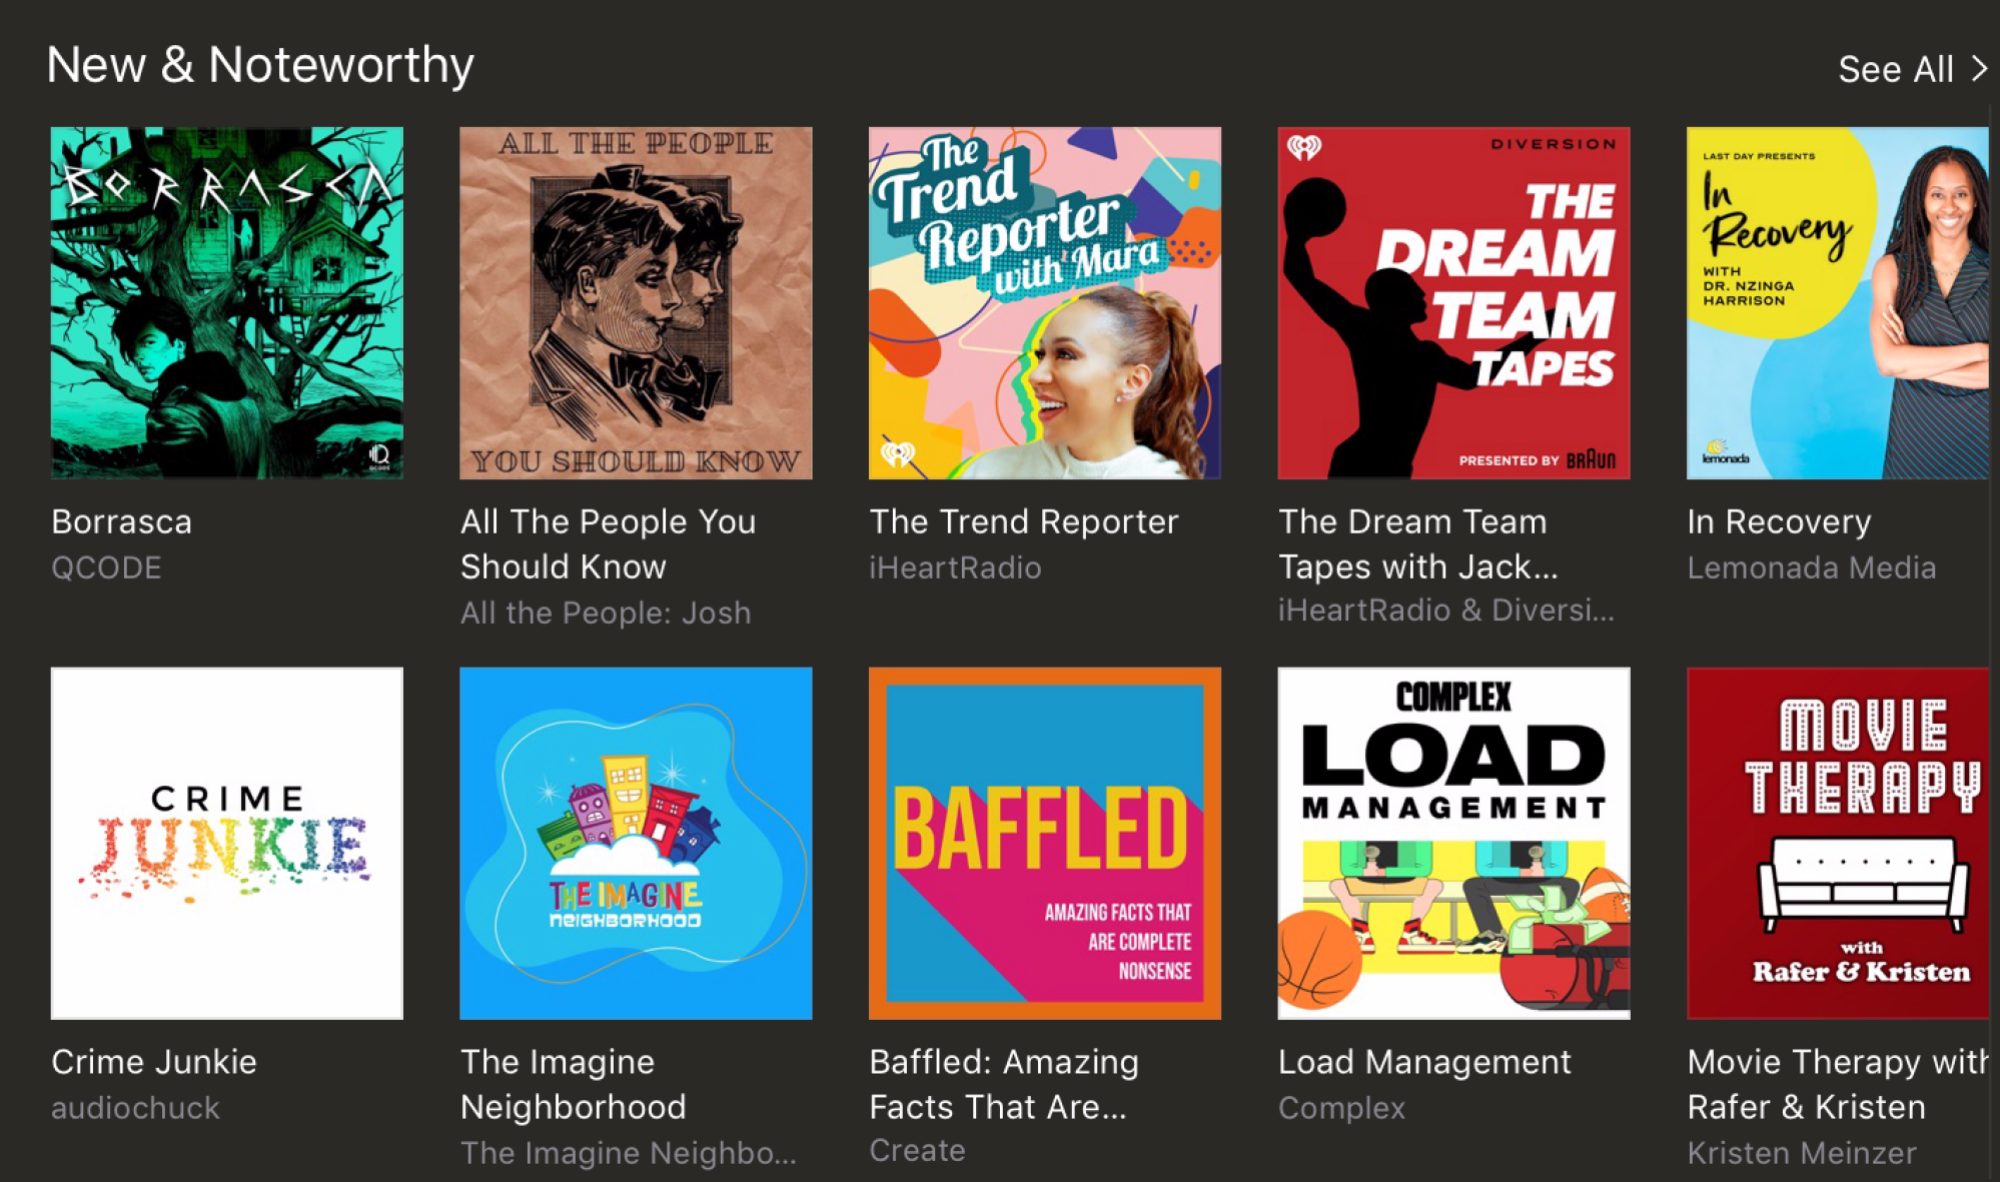
Finally, while it's exciting to get your podcast out to everyone, consider waiting to submit your first episode until you've already received a few of them. For those who stumble upon your show, submitting just one episode can leave a lot to be desired. You're also less likely to be recommended or promoted as something new and noteworthy. So record three or four episodes before you start trying to grow your audience.
