This article explains how to select and install the different speaker wire connectors: banana plugs, spade connectors, and pin connectors. This is a simple and inexpensive upgrade to your home stereo system.
There are three types of wire connectors available for speaker cables: banana plugs, spade connectors, and pin connectors. Each is easy to install and requires only a few simple tools. To choose the right type, you first have to look at the terminals available on your device.
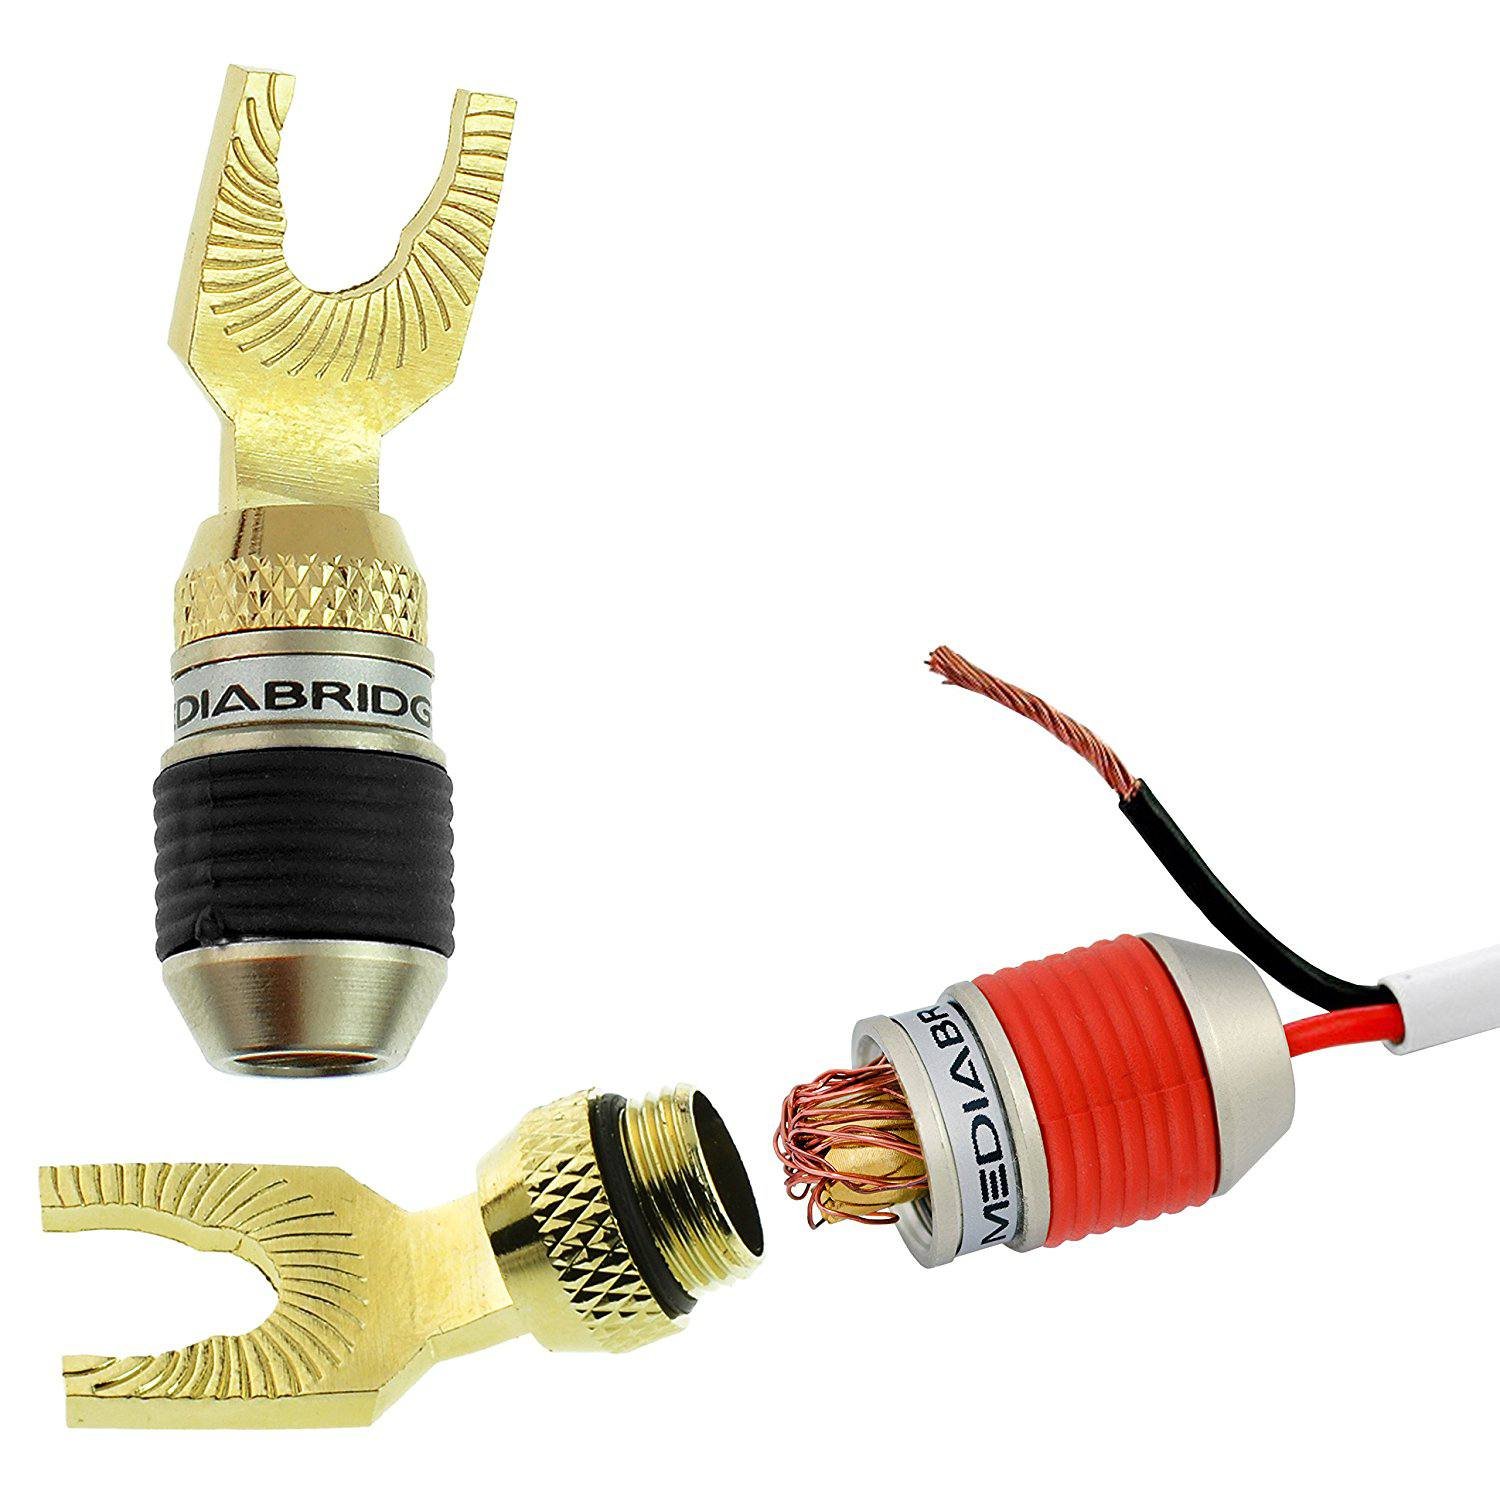
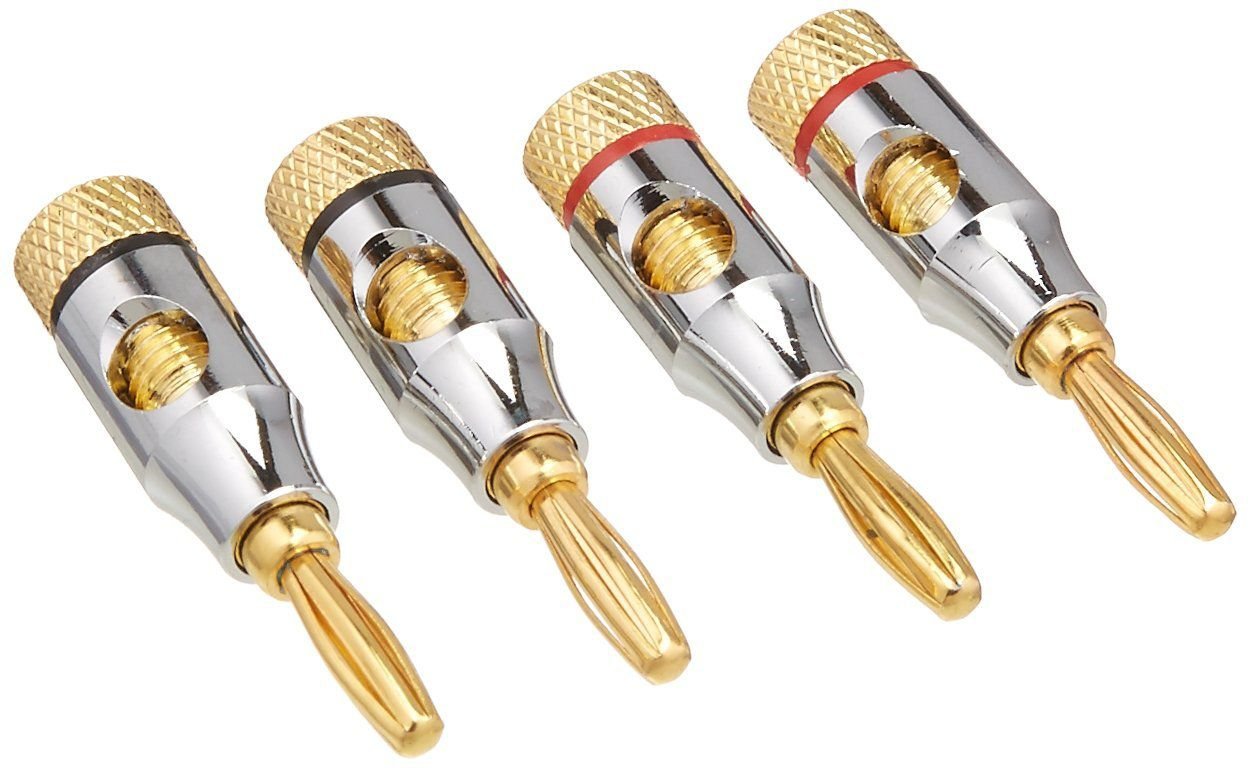
- Banana plugs are used with binding posts and plug directly into the holes on each end (note: not all binding posts have this). There are also dual banana plugs for use with bi-wired/amplified speakers.
- Spade connectors (usually U-shaped) can also be used with binding posts, which maintain contact with the base of the terminal once the binding post screws are tightened (just like bare speaker wire).
- Pin connectors work with spring terminals (also called spring clips), but they also work with binding posts that have a hole in the side of the connector inside (you have to twist the top back far enough to see it).
You can have different types of connections on the back of your stereo equipment. Sometimes there may be more than one type of each type (such as receivers and amplifiers). So, for example, if your speaker has spring clips, you'll need a pair of pin connectors. If your receiver/amplifier has binding posts, you can choose a pair of banana plugs or spade connectors.
Before purchasing any connectors, know the specifications of your speaker wires.
While most connectors work with the most common wire sizes (12 to 18 AWG (American Wire Gauge)), some connectors work with larger or smaller wires. So cross check the dimensions first to ensure best compatibility.
You will need a pair of wire/cable strippers to prepare the speaker wires for the connectors. While scissors or a knife can be used instead, we highly recommend using actual strippers for safety reasons. Make sure to start and finish each end of the speaker wire (i.e. install the connectors) before proceeding to the next step. Here are the preparation steps:
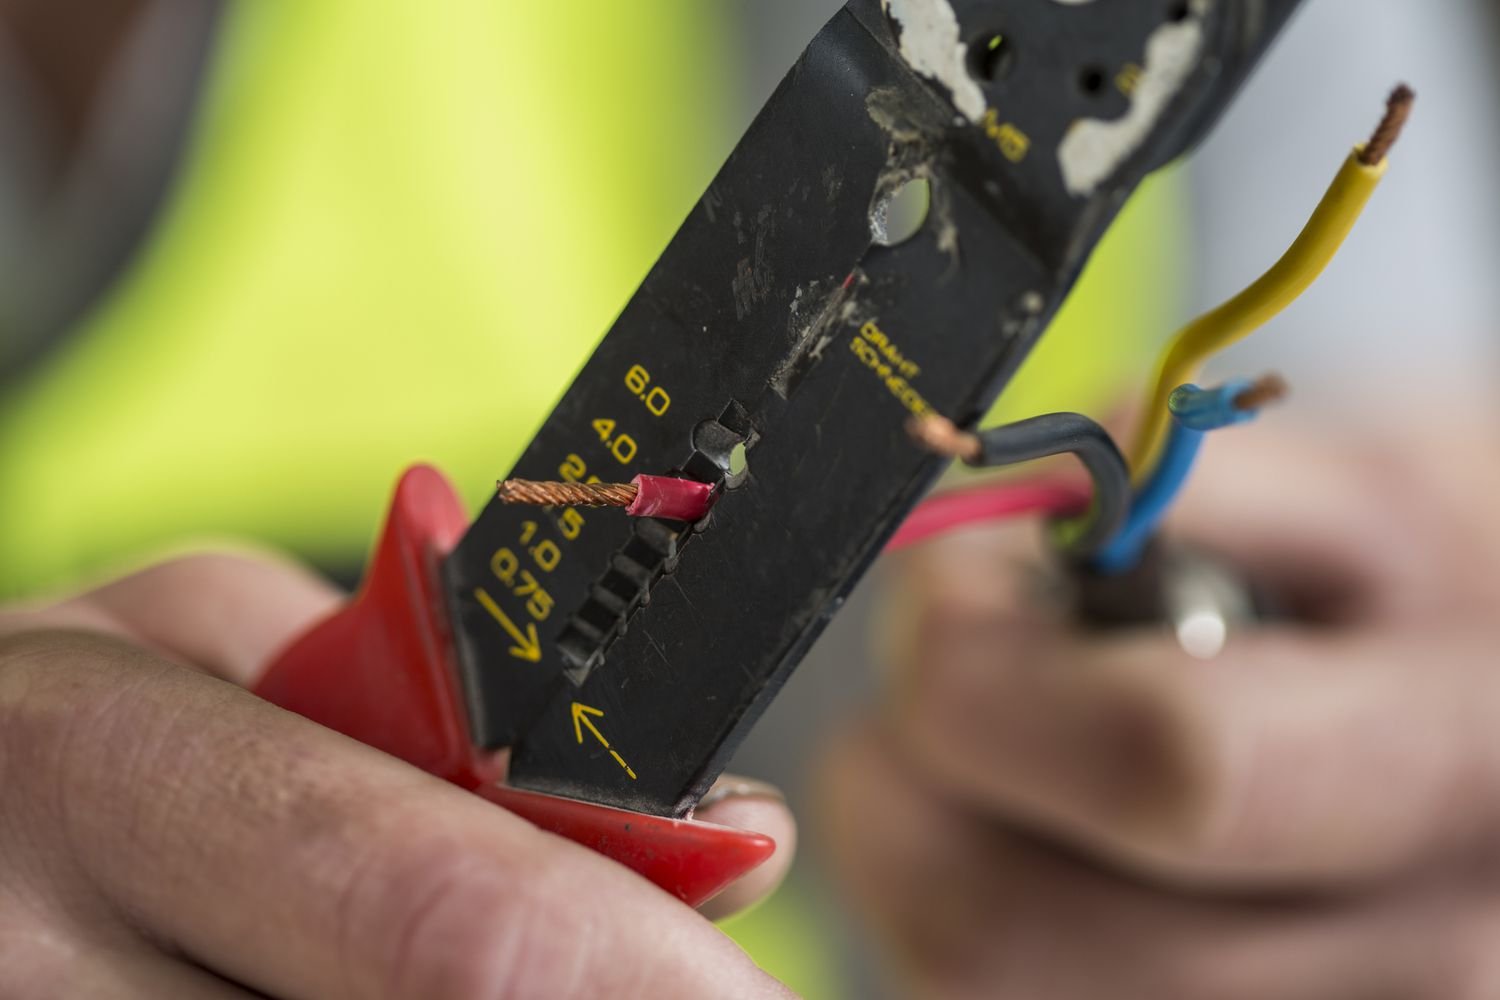
Cut the ends of the speaker wires, making sure there aren't any exposed copper wires sticking out.
Carefully place the individual wires (positive and negative terminals) about two inches apart from each other, which should provide enough space.
Select an individual wire and set the cutting edge of the wire stripper about half an inch from the end. If your wire strippers are designed/marked with different cutting sizes, choose one that matches the cable specifications.
Clamp the wire strippers to cut through the jacket/insulation and rotate the tool around the wire to ensure a clean cut.
Peel off the cut portion of the sheathing - it's easier to use wire strippers, but be careful not to accidentally cut the copper underneath - exposing the bare wires.
Use your thumb and index finger to gently twist the copper wire to keep the strands together.
Repeat this process with the other separate wire.
Now that your speaker cable is split and has exposed ends, you can attach the connectors. Be sure to identify and match the correct polarity (positive and negative) of wires and connectors so that your audio equipment is fully in phase.
There are different techniques for installing speaker wire connectors, depending on each manufacturer's specific design. Although they are banana plug, spade or pin connectors, the installation method usually falls into one of the following categories:

Basic speaker wire connectors will unscrew a few turns and stop (some detach completely). For this type, insert the exposed speaker wire as far as possible into the bottom end. Once the wire can no longer be pushed in, screw the top of the connector back into place. When you tighten it, the exposed speaker wire twists tightly into the plug for a secure connection. The wire should stay in place when you pull it gently.
"Self-crimping" speaker wire connectors come in two (sometimes three) parts. For this type, insert the exposed speaker wire into the bottom half of the connector so that the copper wire comes out of the top. Now you will fan the strands and bend them back over the tip, being careful not to cover any part of the threads. Once done, screw the top half of the connector onto the bottom, clamping the copper wire in place.
Open screw speaker wire connectors have a gap in the connector itself. In addition to running the wires through the bottom, these connectors also allow you to plug them into holes on the sides.
Unscrew the connector piece until you see enough room to feed the bare copper wire into the side gap. Insert the speaker wires and tighten the connector to lock it in place (you can see the parts clip together). These types (when the wires are connected through the sides) are helpful for those interested in daisy chaining speaker connections.
You can also find speaker wire connectors that only use open screws. These tend to be spring-loaded, and compressing the connector between your thumb and index finger opens a gap for the speaker wire to be inserted. Once released, the connector clamps and holds the wire securely in place.
Some speaker wire connectors (sometimes called screw-lock connectors) require a small flat-blade screwdriver for installation. These connectors are divided into two parts - we can call them "inner" and "outer".
Remove the inside of the connector and use a screwdriver to loosen the two embedded screws. Now plug the speaker wire into the end until you can go no further. Use a screwdriver to tighten the embedded screws to secure the wires. Attach the outside of the connector to the inside and screw the two pieces together (by hand).
By using colored connectors, you'll never have to double-check, worry, or second-guess again. Speaker wire connectors can save you a lot of headaches, especially with multi-channel home stereo systems.
While the terminals on speakers and home audio equipment are almost always color-coded to indicate polarity—positive terminals (+) are red and negative terminals (-) are black—the same is not true for speaker wires.
Not all speaker wires have two-color insulation and prominent markings (e.g., text, dotted lines, or stripes usually indicating the positive terminal) for easy identification.
If you're not sure, you can always quickly test the speaker wire.
Speaker wire connectors also make it easier to plug and unplug speakers from receivers and amplifiers. The wires must be in one piece (usually by twisting them together) before inserting them into a spring clip or binding post. This can be difficult when it's hard to see and there's limited space between posts; if you miss and mess up/fray the wire, you'll have to re-straighten it and start over.
But because speaker wire connectors house and protect the bare wires, the experience of plugging in and out of audio is greatly simplified, no different than using an RCA jack.
In addition to simplifying audio cabling, speaker wire connectors help maintain a strong connection. As long as the earbuds are installed correctly, your stereo speakers will maintain a high-quality signal for optimal sound. If that's not enough reason to consider speaker wire connectors, they can also help give your equipment a cleaner, more organized, and more refined appearance.
Of course, the backs of speakers, receivers, and amplifiers may not be the most provocative. However, the people who impress you (including yourself) will be the lovers who are willing to take a peek at what's going on with you.
FAQYes. Differences in speaker cables that affect sound include capacitance, inductance, and resistance. Likewise, wire performance is affected by gauge, length, and composition.
Speaker wire connectors are available at Best Buy, Home Depot, and Walmart. You can also order wire connectors from Amazon and other online retailers.
