what to know
- Disable automatic iCloud sync from Settings > Profile Name > iCloud > Photos > Sync this iPhone .
- Choose a cloud alternative such as Google Photos. Log in to Google Photos > Click on the profile photo > Backup to open it.
- Sign in to another iCloud account from Settings > Apple ID .
iCloud is the default backup for photos and videos, but if you delete any photo on your iPhone, it will also be deleted from iCloud. This article will show you the workaround that allows you to delete photos from iPhone instead of iCloud.
Depending on your needs, you can try multiple methods to clear space on your iPhone.
iCloud photo sync is the default setting on every iPhone. It will automatically sync with the photos on your iPhone as long as there is space on your iCloud account. In short, this means:
- Any photos on your iPhone or iCloud are identical, not copies.
- If sync is enabled, any photos deleted from iPhone are also deleted from iCloud.
Please follow the steps below to turn off iCloud sync.
Open Settings from your iPhone home screen and tap your name.
On the Apple ID screen, select iCloud > Photos .
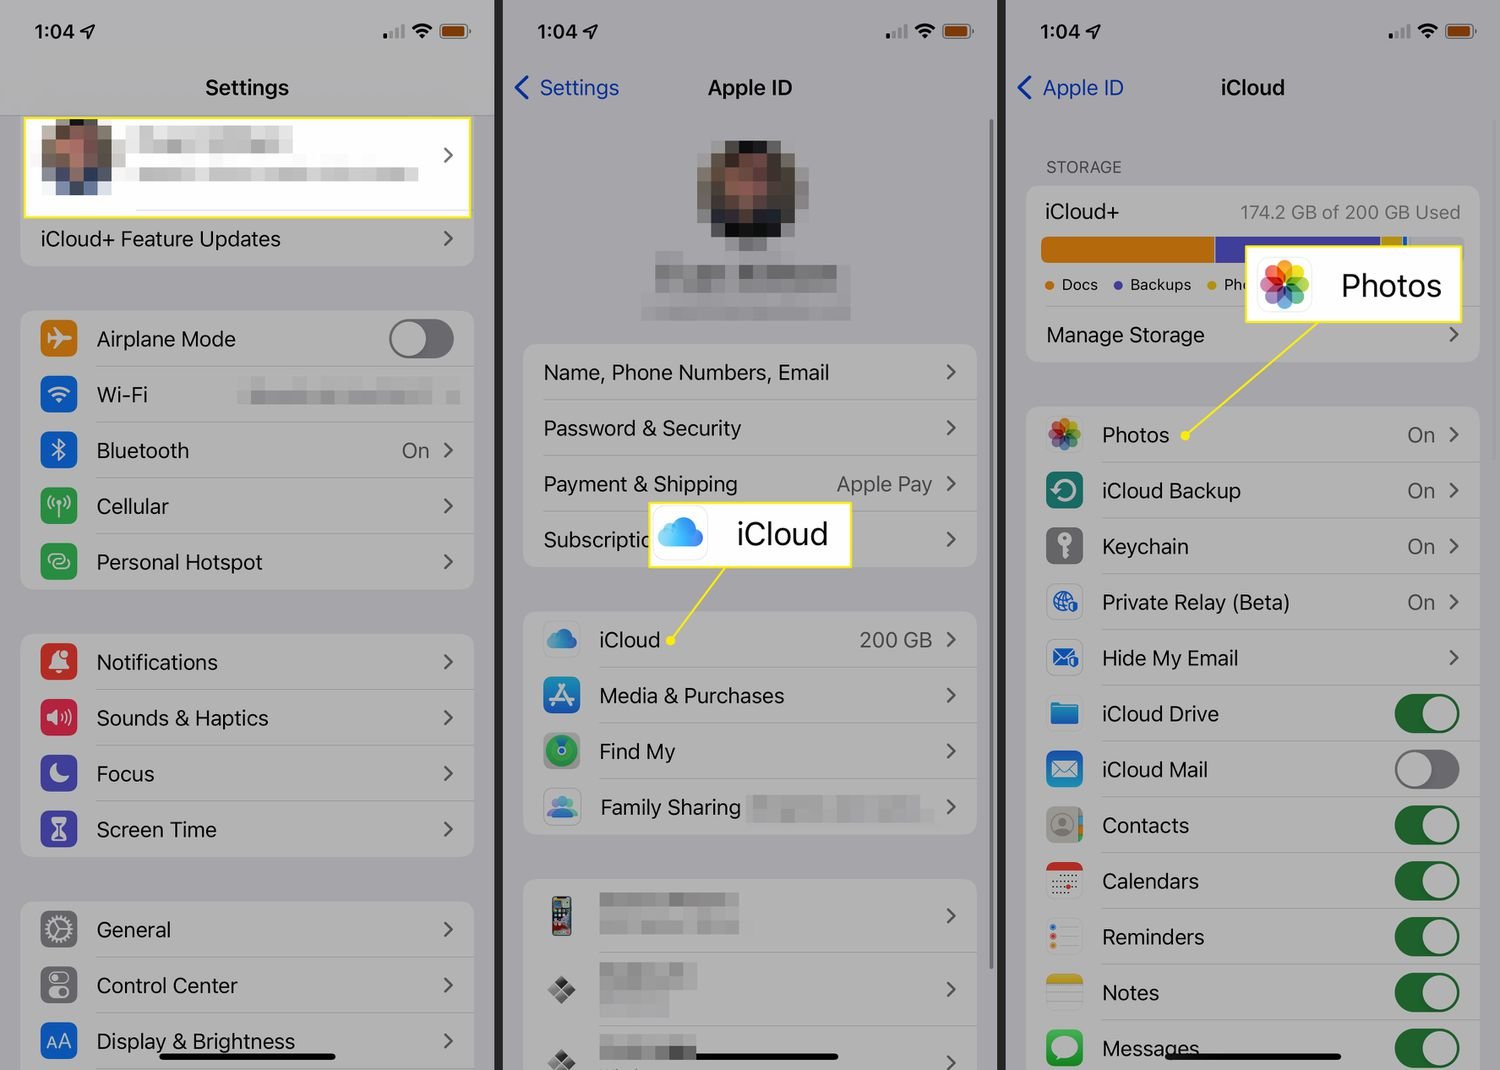
Use the Sync this iPhone toggle to disable syncing.
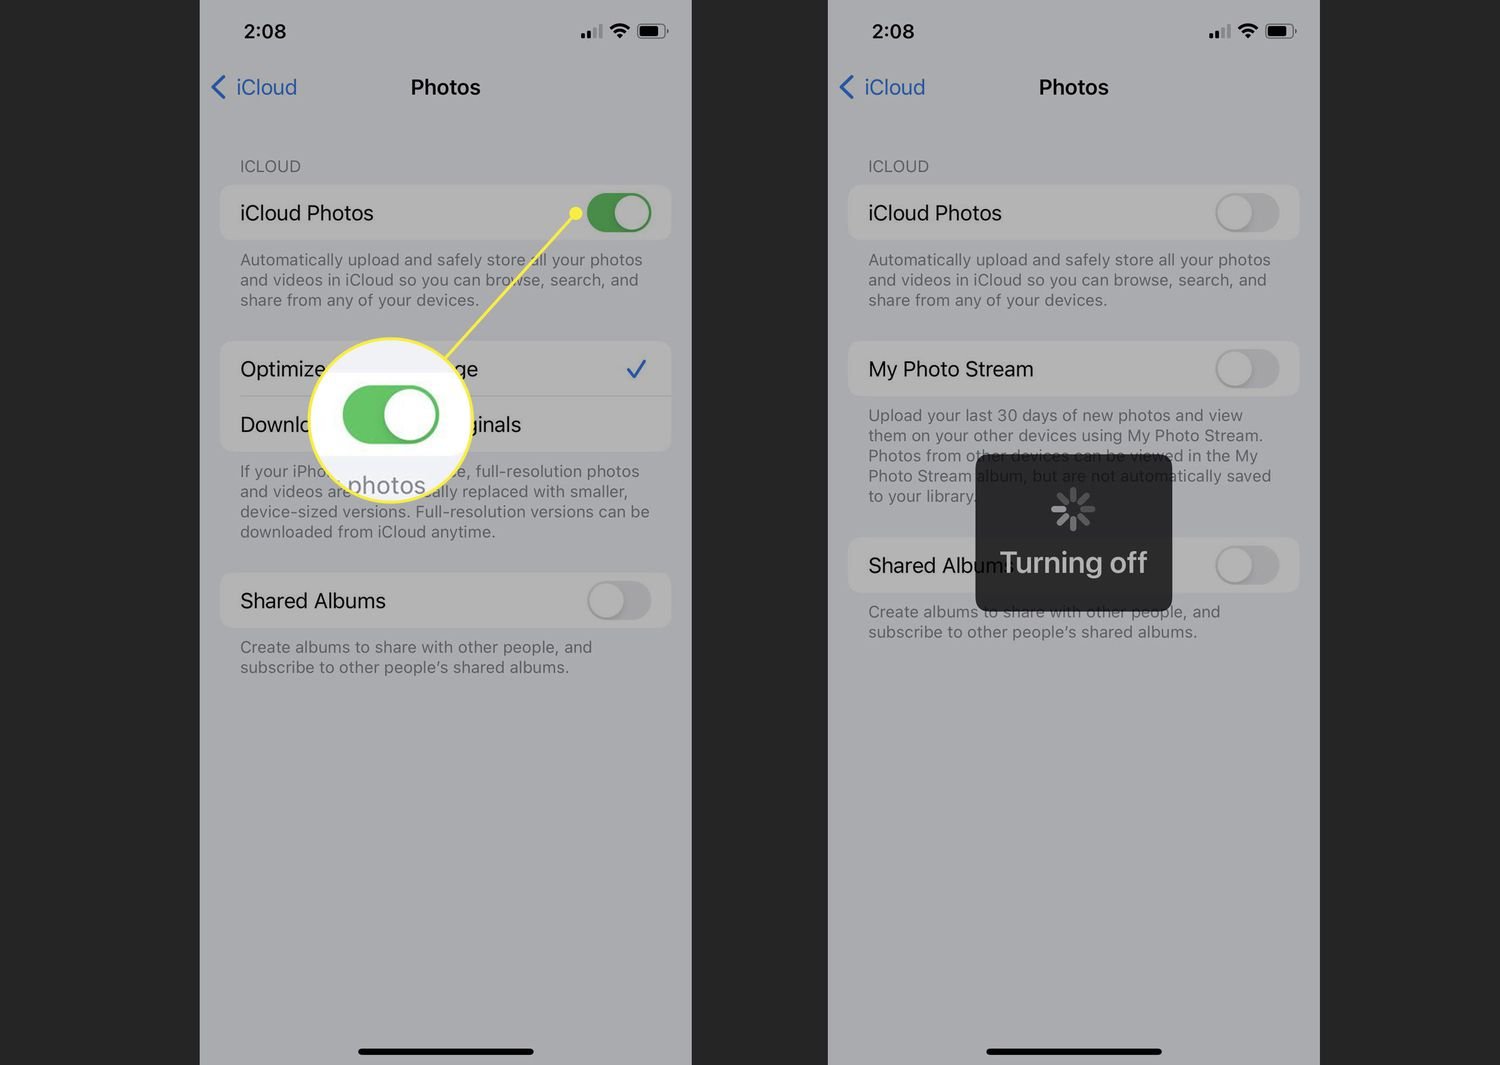
After disabling the connection between iPhone and iCloud, you can safely delete photos from iPhone.
Using another cloud storage as a photo backup is an easy solution. Choose from Google Photos, Dropbox, Microsoft OneDrive or any other. Google Photos is the ideal photo storage solution for creating photo backups that don't rely on iCloud.
Download and open the Google Photos app.
Sign in to Google Photos with the Google Account you want to use.
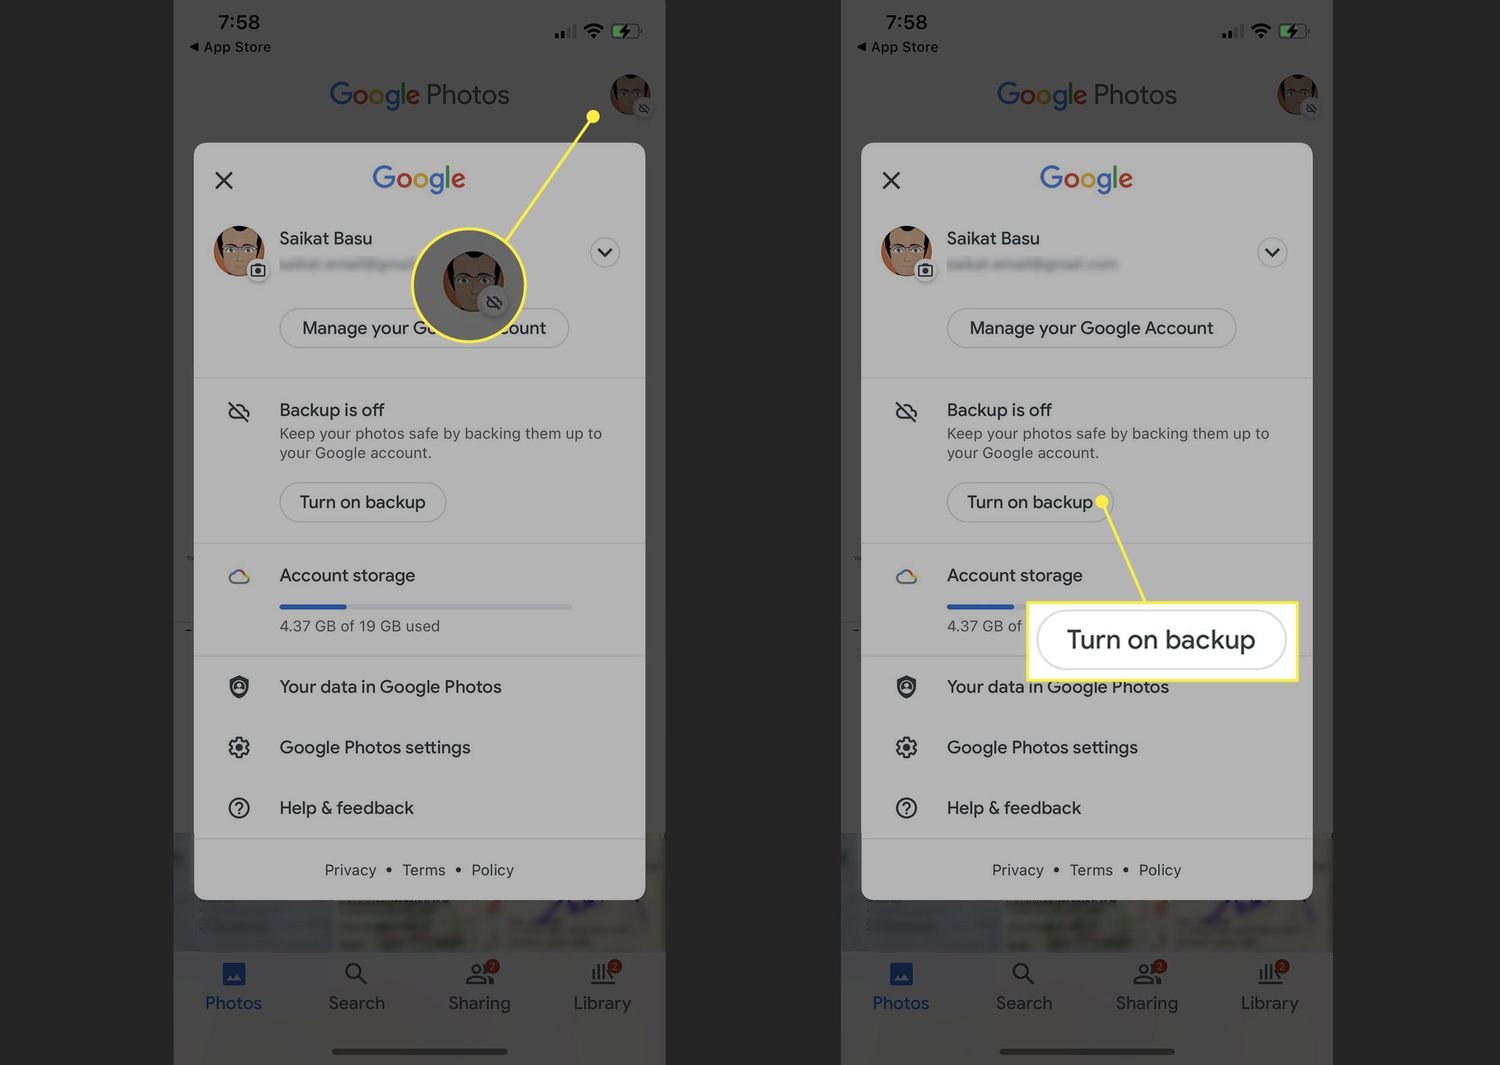
Select your Google profile photo or initials in the upper right corner.
Select Settings > Backup and turn it on.
Choose a backup quality to store photos at original resolution or reduced quality.
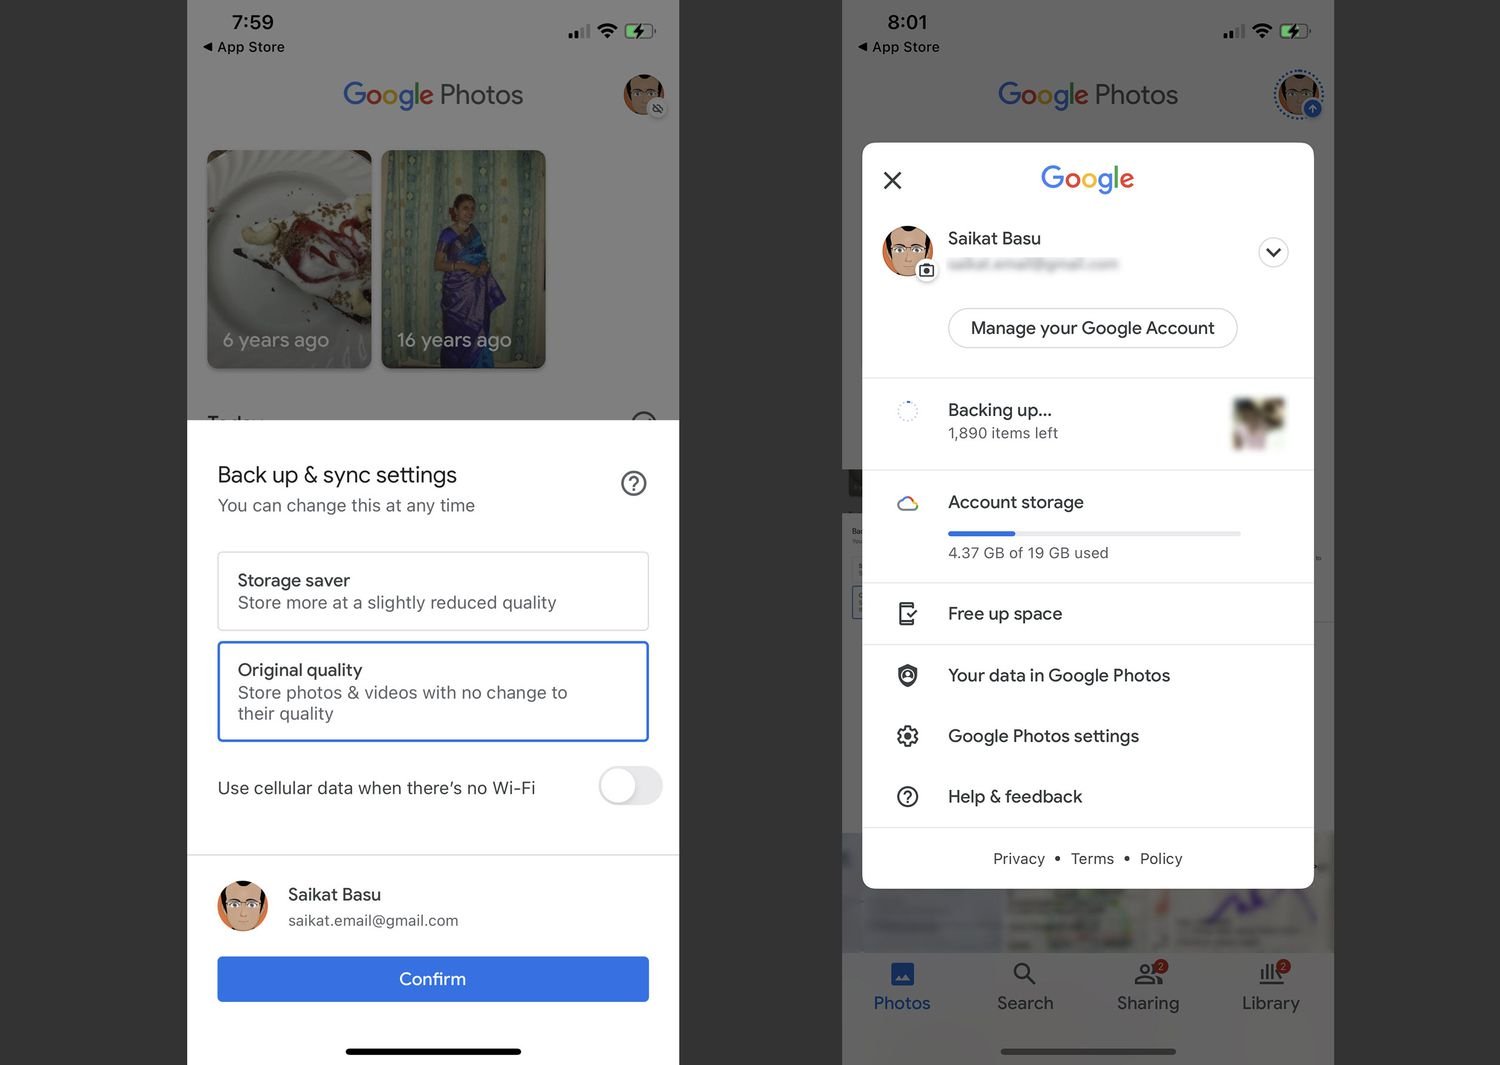
Select Confirm to start the backup process.
The backup may take some time depending on the number of photos and videos. Once the process is completed, select and delete any photo from the iPhone’s Photos app. You can still view all your backed up photos and videos in the Google Photos app and Google Photos on the web. However, you can only delete them from Google Photos.
Signing out of one iCloud account and using another iCloud account is a troublesome workaround. However, when you delete photos from iPhone, you can keep them in iCloud. The old iCloud account will save your synced photos until you sign out, and you can use your new iCloud account to sync everything from now on.
Select Settings .
Click on your name at the top of the "Settings" option.
Select Sign out from the bottom of the screen. Enter your Apple ID password to turn off Find My Phone and unlink your phone from this iCloud account.
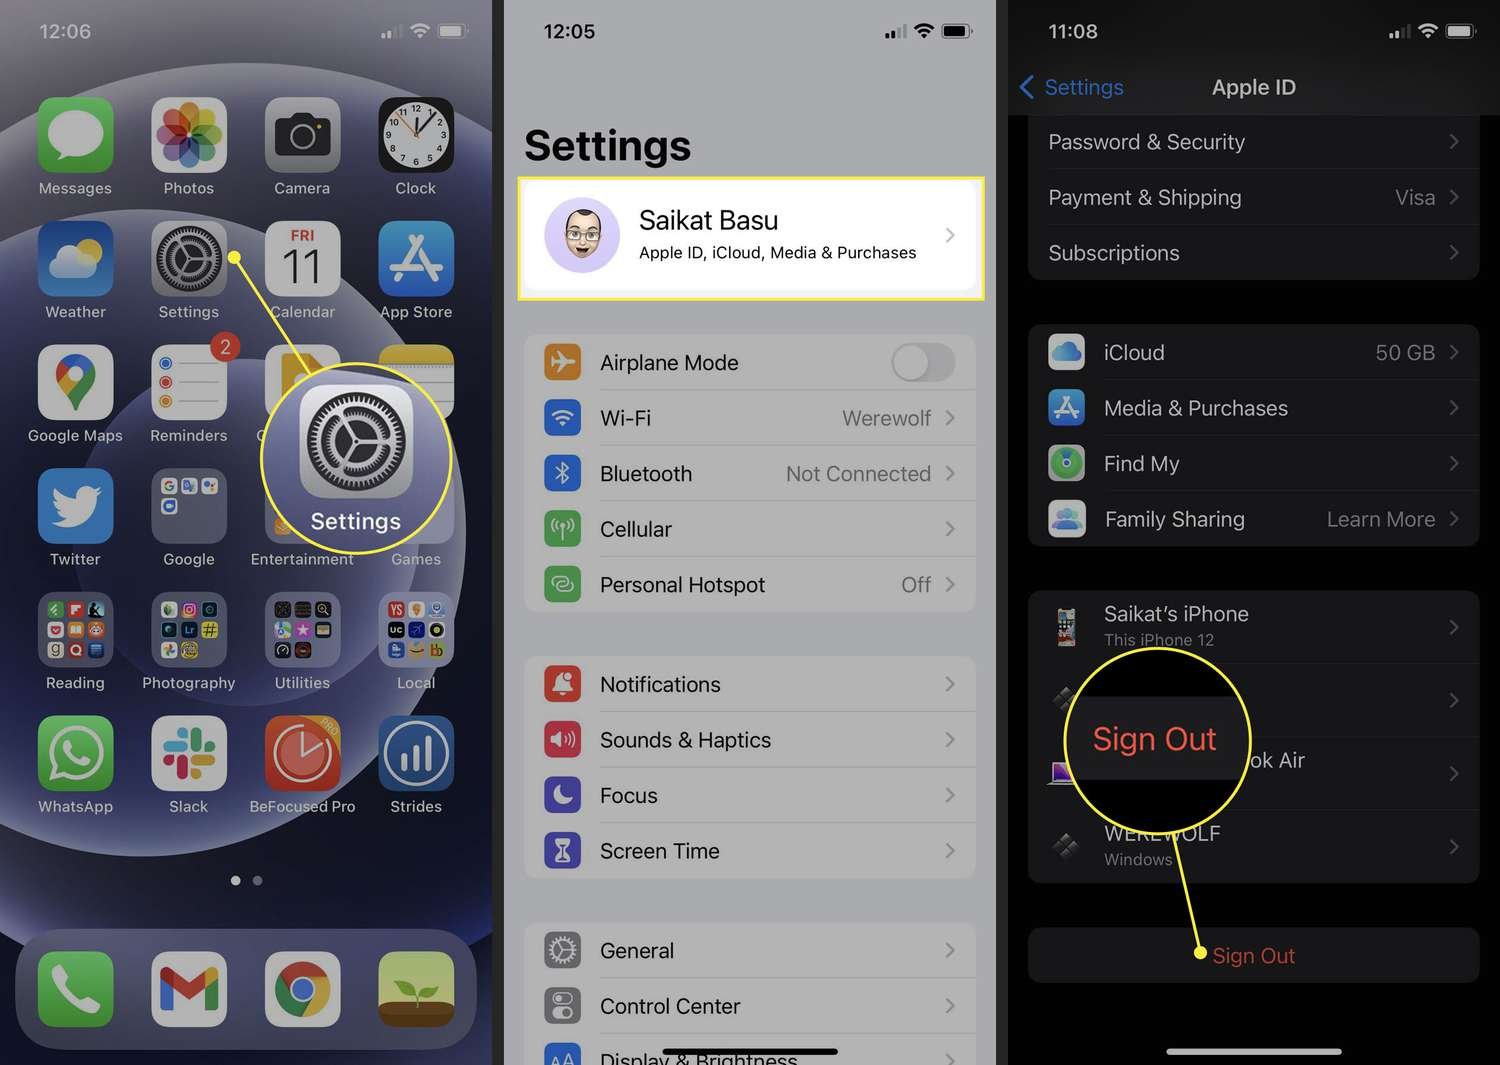
Select Settings > Apple ID to sign in to your new account.
Now, delete photos from iPhone. The backup copy will not be deleted from the old iCloud account.
Consider this solution if you have a lot of photos and want to keep them within the Apple ecosystem and accessible from all Apple devices you own.
hint:
If you want to recover deleted images, check the Recently Deleted folder in the Photos app and your iCloud account. You have 30 days to recover deleted pictures.
FAQThere is currently no way to delete all photos at once, but you can use the process of deleting multiple photos on iPhone to clear your library in minutes. Open Photos > Select All Photos > Tap Select , then swipe your finger from right to left across the bottom row of photos, then drag up until you reach the oldest file to select all the photos. Then, click on the trash can icon.
Deleting items from the Photos app is only half of the process. To delete them permanently, you need to clear them from the Recently Deleted folder as well. Otherwise, your iPhone will automatically delete them after 30 days. To do this, open the Photos app and select Albums > Recently Deleted > Unlock the album using Touch ID or Face ID > Then tap Delete All .
