what to know
- Enable the Finder path bar: Open Finder and select Show Path Bar from the View menu.
- Add a path icon to the Finder toolbar: Select View in the Finder menu bar, and then select Customize Toolbar .
- The path bar shows the path from the folder you are currently viewing to the top of the file system.
This article explains how to display the Mac Finder path bar. The information in this article applies to macOS Catalina (10.15) through OS X (10.5) Leopard.
The Finder path bar is disabled by default, but it only takes a few seconds to enable it.
First open a Finder window on your Mac. An easy way to do this is to click the Finder icon in the Dock.

With the Finder window open, select Show Path Bar from the View menu.
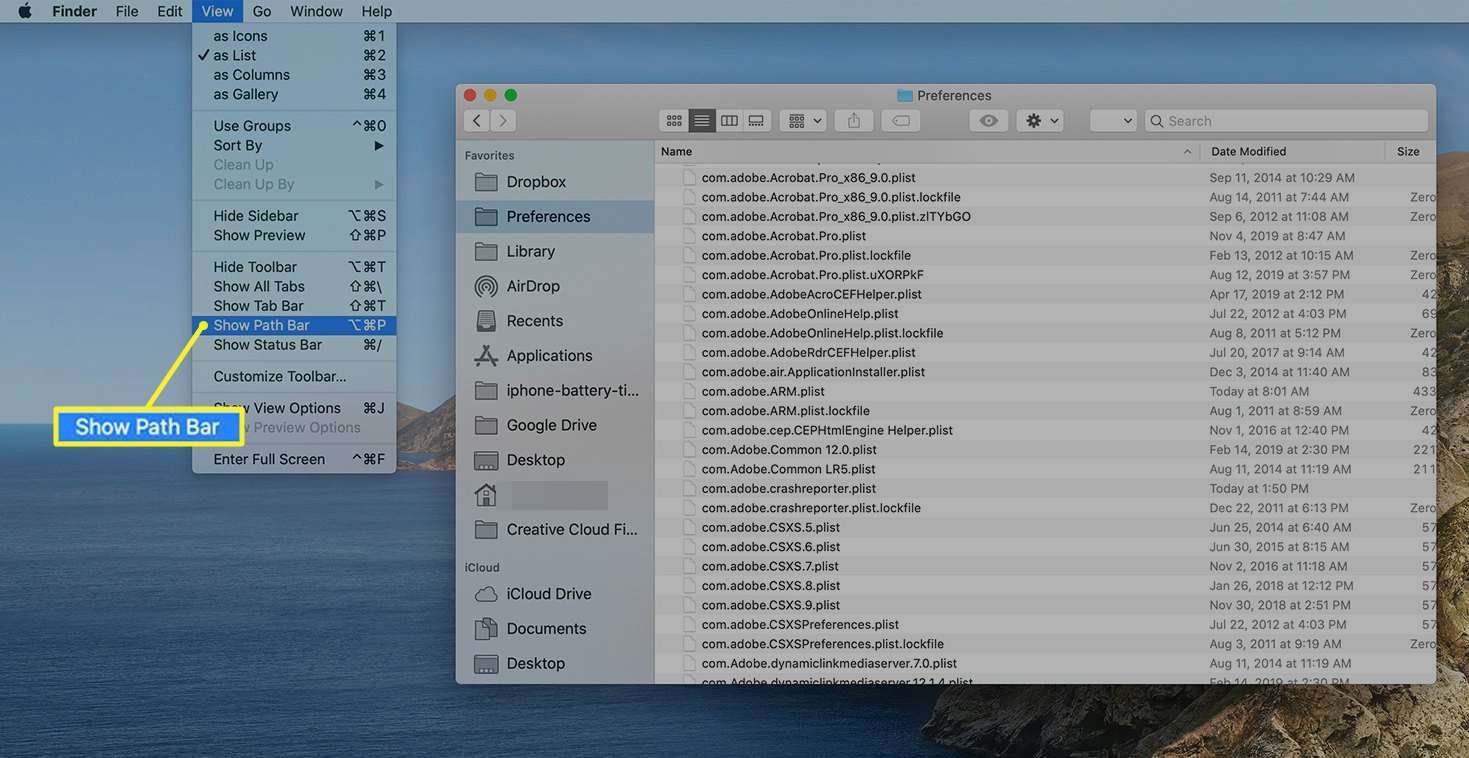
The Path bar appears at the bottom of all Finder windows, showing the path to any file or folder you select.
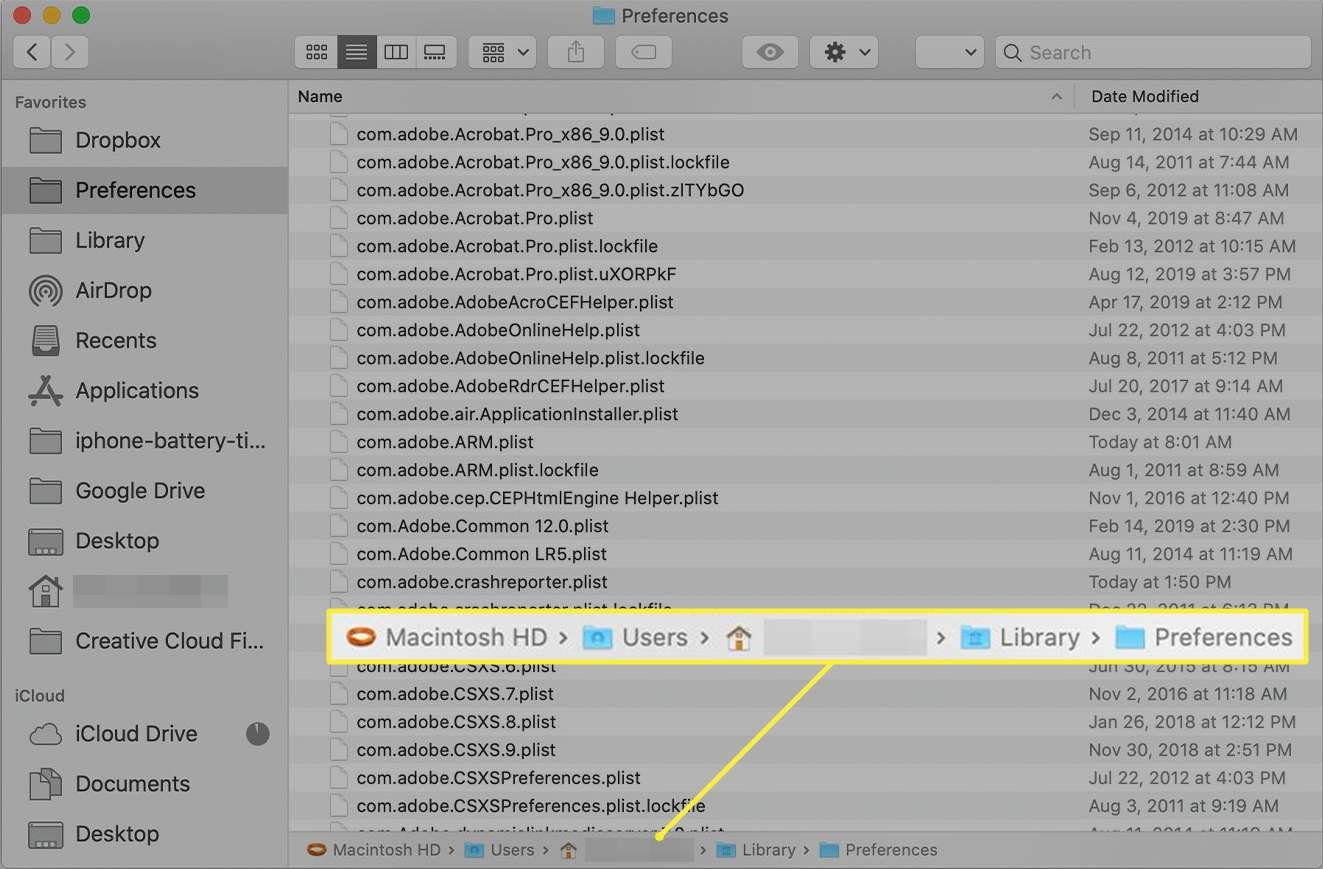
The Finder path bar is a small pane at the bottom of the Finder window, below the files and folders listed. The path bar shows the path from the folder you are currently viewing to the top of the file system. In other words, it displays the path created when you reached the current folder by clicking Finder.
If you decide you prefer a more minimalist Finder window, you can close the path bar just as quickly as you opened it.
Open a Finder window.
Choose Hide Path Bar from the View menu.

The path bar disappears.
In addition to its obvious use as a road map showing where you've been and how to get here from there, the path bar also provides other handy features.
- Double-click any folder in the path bar to go to that folder.
- Move files and folders to any item in the path bar by dragging and dropping. Duplicate an item by holding down the Option key while dragging, or create an alias of an item by holding down the Command + Option keys while dragging.
- Move folders in the path bar. This is handy if you accidentally create a folder at the wrong level, it would be better if it moves one level up or down in the existing path. Drag the folder to where you want it in the path.
- The truncated folder name will usually appear in the path bar. You can expand the Finder window to see the full name of a folder, but this doesn't work well if there are a lot of truncated folder names in the path bar. A better approach is to place the cursor on the folder whose name is truncated. After a second or two, the folder will expand to show its full name.
- The path bar is also available when you perform a Finder search. When the search results appear in the Finder, you can discover where the item is stored by selecting the item in the search results and then looking at the Path bar.
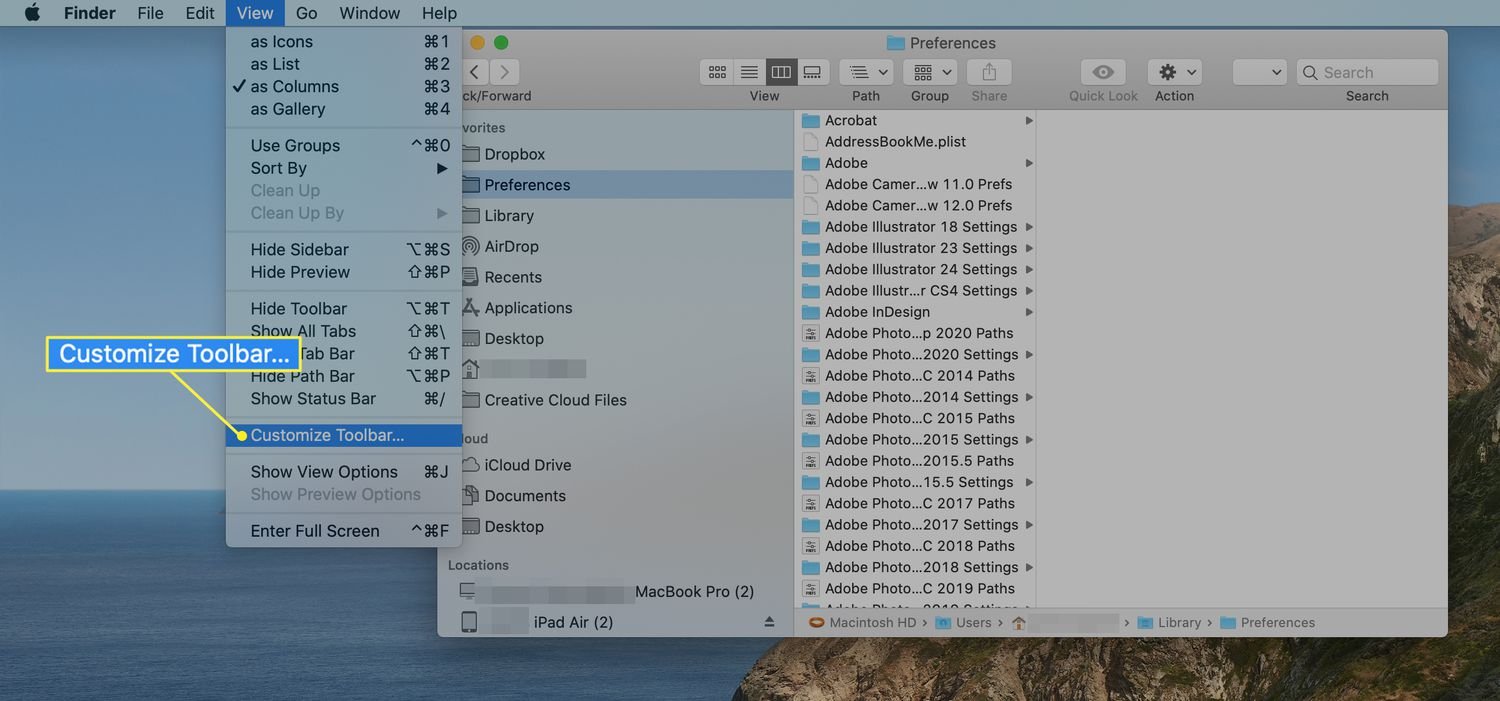
The path bar is convenient, but there are other ways to display the path to your project. One way is to add the Path icon to the Finder's toolbar by selecting View in the Finder menu bar and selecting Customize Toolbar .
Drag the path icon to the top of the Finder window.
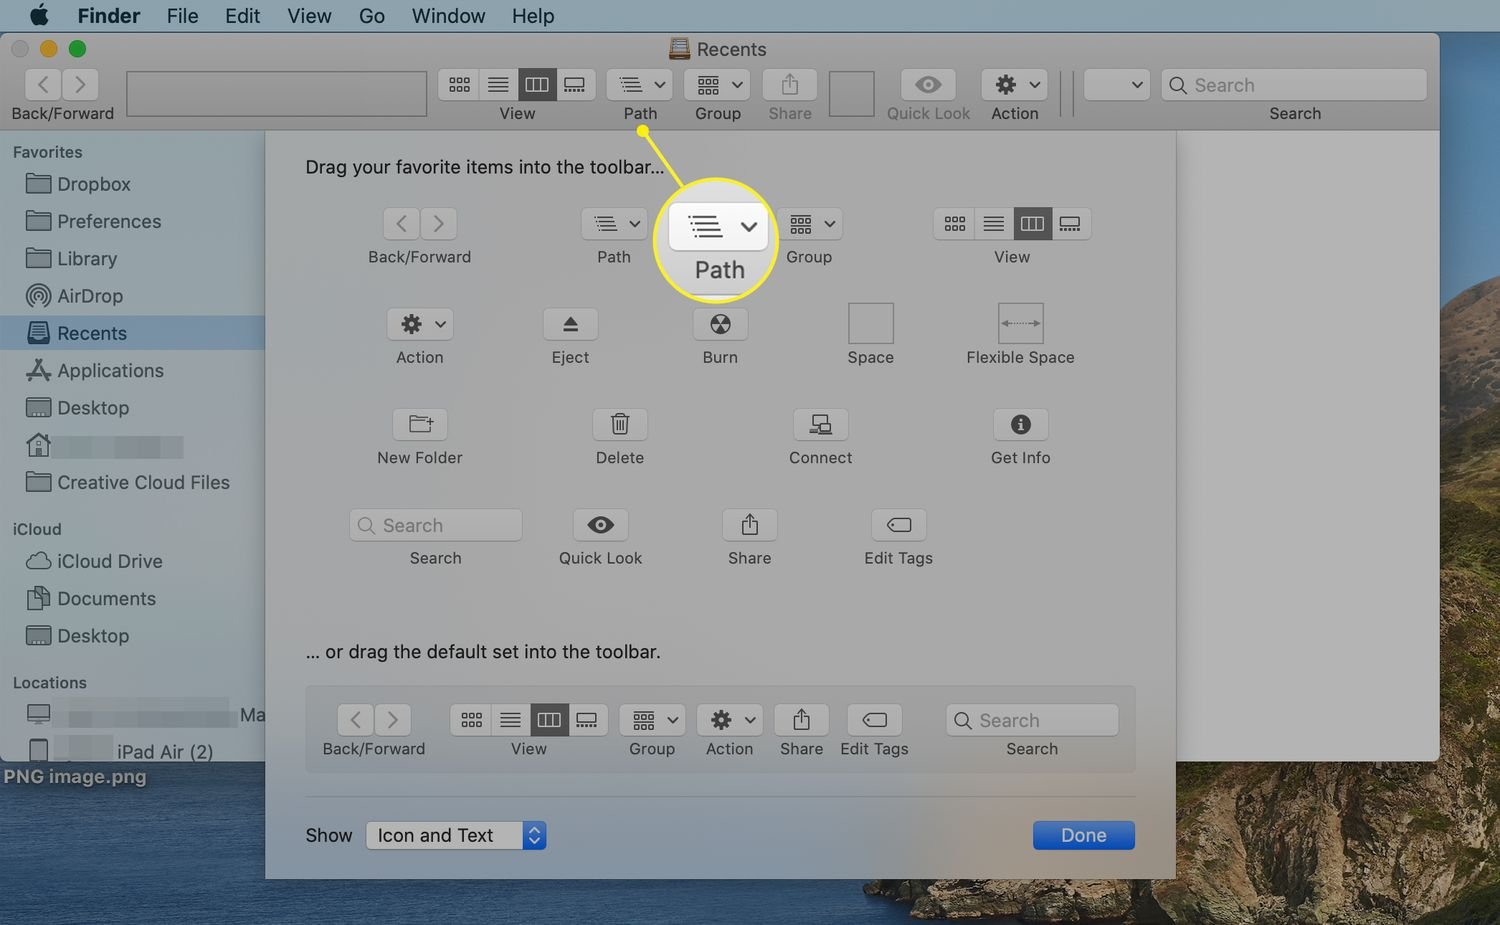
The path icon shows the path of the currently selected item, just like the path bar. The difference is that the path bar displays paths in a horizontal format, while path icons use a vertical format. Another difference is that the Path button only displays the path when the button is clicked.
The final way to display an item's path in a Finder window is to use the Finder's title bar and its proxy icon. Finder's proxy icon can now display paths. All you need to do is right-click on the icon. The path uses a series of icons to display the path of the current Finder window. However, with a bit of Terminal magic, you can change the Finder's title bar and its proxy icon to show real pathnames rather than a bunch of icons. For example, if you open a Finder window on the Downloads folder, the standard agent icon is a folder icon named "Downloads." After using this Terminal trick, the Finder displays a small folder icon followed by /Users/YourUserName/Downloads.
To make the Finder's title bar display long pathnames, do the following:
Launch the terminal , located in /Applications/Utilities/.
At the terminal command prompt, enter the following:
The default is written to com.apple.finder _FXShowPosixPathInTitle -bool true
You can triple-click the Terminal command here to select an entire line of text and then copy/paste that line into the Terminal window.
Press the Enter or Return key.
At the terminal prompt, enter:
Kill Finder
Press the Enter or Return key.
The Finder restarts, and any Finder window after that displays the long path name of the folder's current location.
If you decide you don't like Finder always showing long pathnames, you can turn off that feature using the following Terminal command:
At the terminal command prompt, enter the following:
The default is written to com.apple.finder _FXShowPosixPathInTitle -bool false
Press the Enter or Return key.
At the terminal prompt, enter:
Kill Finder
Press the Enter or Return key.
The Finder path bar and Finder's related path features can be convenient shortcuts for working with files and folders. Try this clever hidden feature.
FAQYour Mac's Finder (sometimes called the Desktop) is what you see by default when you first start your computer. When you use Finder, you'll see Finder next to the Apple icon in the upper left corner of the screen, and a Finder bar at the bottom of the screen.
Select the Apple icon in the upper left corner and then select "Force Quit" to force the unresponsive Finder to quit. Or press Command + Option + Esc to open the Force Quit Application menu and select Finder > Restart .
