what to know
- Open Disk Management, right-click the drive, and select Format . Enter a name.
- Under File System , select NTFS . Under Allocation unit size , select Default . Uncheck Perform quick format .
- The format command can be used to format a drive in the command prompt.
Formatting a hard drive means erasing all information on the drive and setting up the file system so that the operating system can use it. If you plan to use your hard drive with Windows, you will need to format it.
Follow these simple steps to complete hard drive formatting in Windows 11, Windows 10, Windows 8, Windows 7, Windows Vista or Windows XP:
If the hard drive you want to format has never been used or has just been wiped clean, you will need to partition the hard drive. After partitioning, return to this page for help formatting the drive.
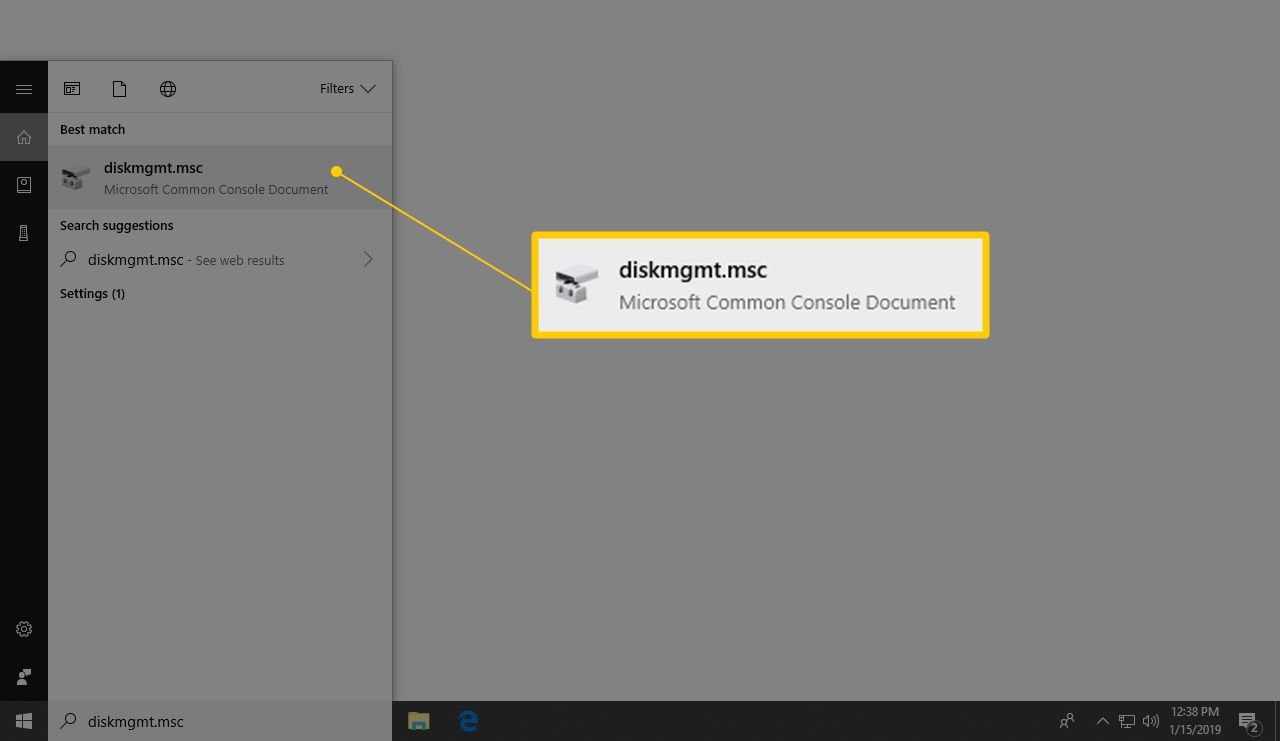
Open Disk Management, a hard disk manager included in all versions of Windows. This can be done in a number of ways, but the easiest is to type diskmgmt.msc in the Run dialog box or Start menu.
Find the drive you want to format from the top list. This tool contains a lot of information, so if you can't see everything, maximize the window.
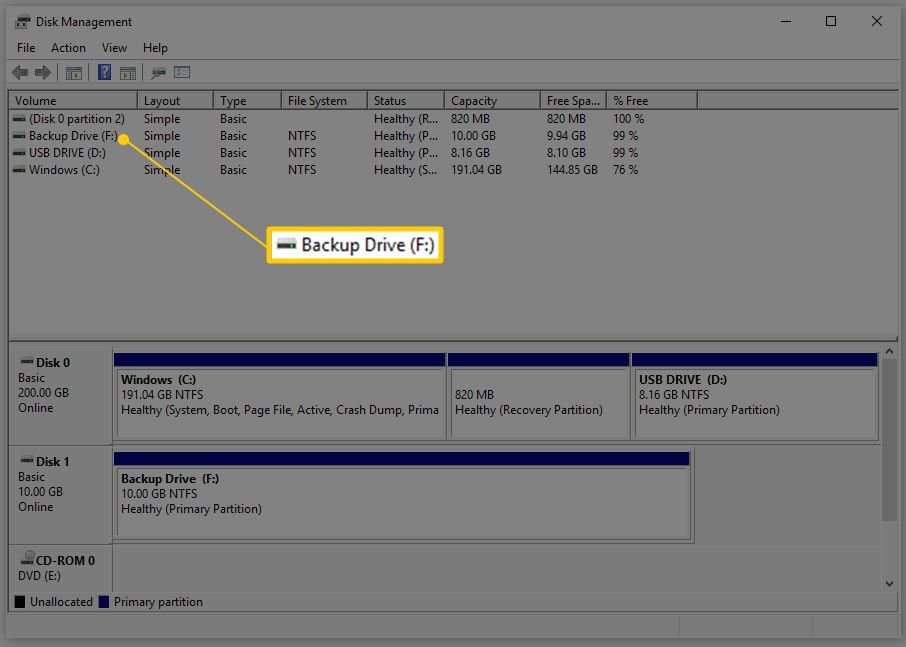
Find the amount of storage on the drive and the drive name. For example, if the drive name says "Music" and it has 2 GB of hard drive space, you might have selected a small flash drive full of music.
If you're sure you want to format the correct device, feel free to open the drive to make sure it's what you want to format.
If you don't see the drive listed at the top or the Initialize Disk window appears, it probably means the hard drive is new and hasn't been partitioned yet. Partitioning is something that must be done before a hard drive can be formatted.
Right-click the drive and select "Format" to open the Disk Format Wizard.
Now is a perfect time to remind you that you really, really, really need to make sure this is the right drive. You certainly don't want to format it wrong.
- Existing drive : If you are formatting a drive that you have been using and that contains data, double-check in File Explorer that the drive letter you selected in Disk Management is the same as the drive letter you see in the file that contains your File Explorer of the information to be deleted. Once formatted, the existing data on the disk may be unrecoverable for most people.
- New drive : If you are formatting a new drive, a good way to tell if it is the correct drive is to look at the File System column at the top of Disk Management. Your existing drive will show the NTFS or FAT32 file system, but the new, unformatted drive will show RAW.
You cannot format the C drive or any drive where Windows is installed in Windows. In fact, the Format option isn't even enabled for the drive with Windows installed.
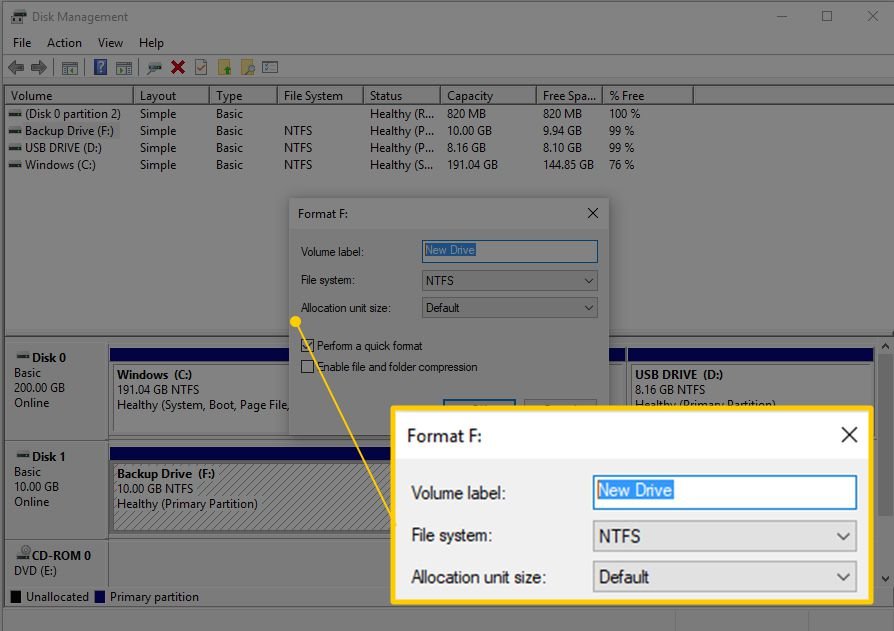
In the Volume Label text box, enter any name you want to give the drive. If the drive has a previous volume label and that makes sense to you, be sure to keep it.
Drive letters are assigned during the Windows partitioning process, but can be easily changed after formatting is complete. If you wish, you can change the drive letter after the formatting process is complete.
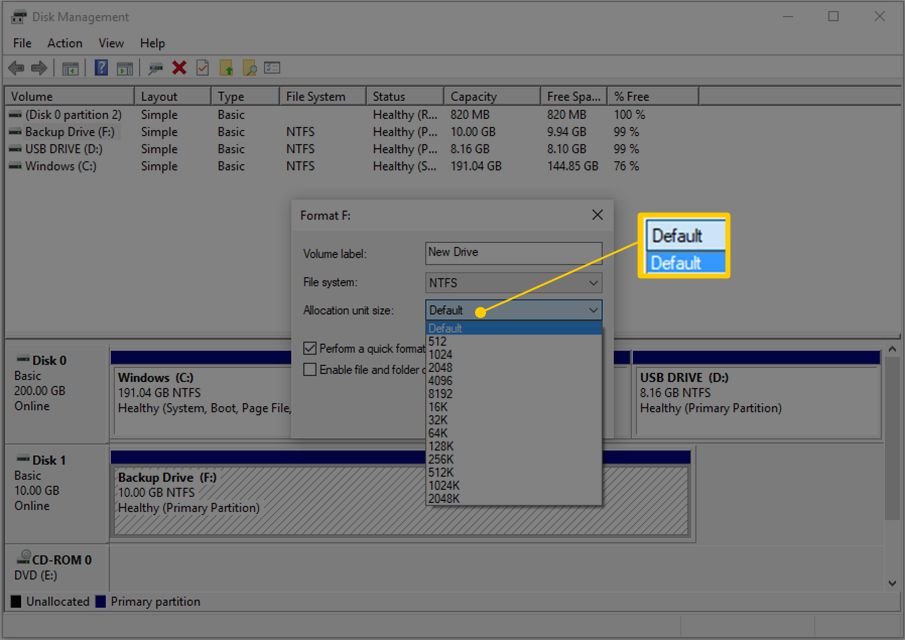
Next is the choice of file system. In the File System text box, select NTFS .
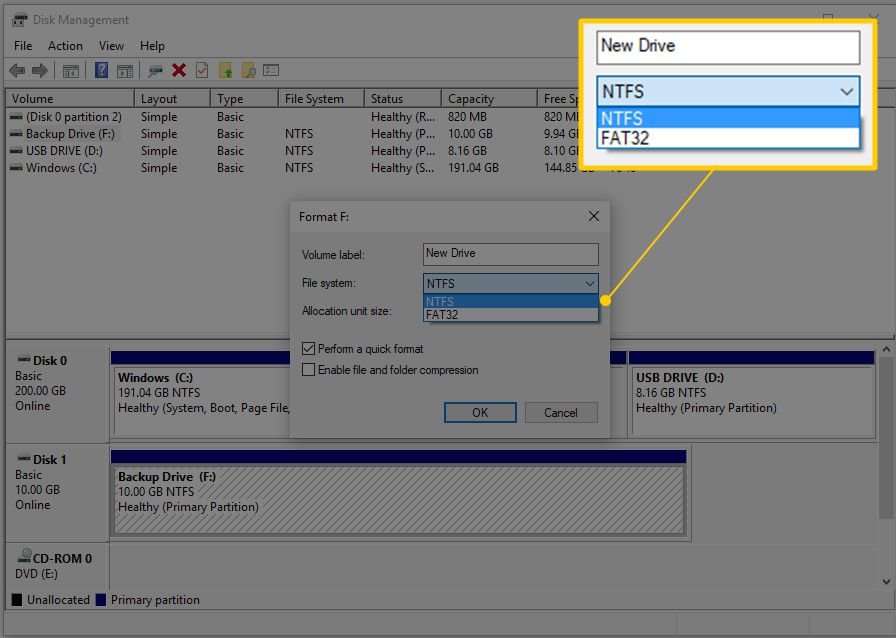
NTFS is the newest file system available and is almost always the best choice. Select FAT32 only if the program instructions you plan to use on the drive explicitly ask you to do so (FAT—actually FAT16—is not available unless the drive is 2 GB or smaller). This is not common.
In the Allocation unit size text box, select Default . The optimal allocation size will be chosen based on the size of the hard drive. It is not common to set a custom size when formatting a hard drive in Windows.
Next is the Perform Quick Format checkbox. Windows checks this box by default and recommends that you perform a "Quick Format", but we recommend that you uncheck this box in order to perform a "Standard Format".
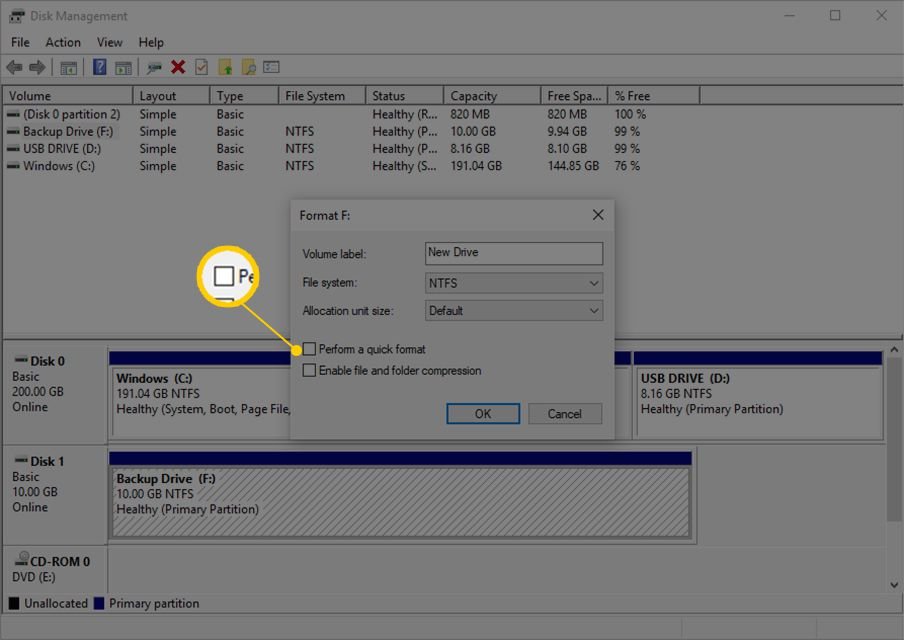
In the standard format , each individual "section" of the hard drive (called a sector) is checked for errors and overwritten with zeros - sometimes a very slow process. This process ensures that the hard drive physically works as expected, that each sector is a reliable location for storing data, and that existing data is not recoverable.
In a quick format , bad sector searches and basic data cleaning are skipped entirely, and Windows assumes the hard drive is error-free. Quick format is very fast.
Of course, you can do whatever you like - either method will format the drive. However, especially with old and brand new drives, we would rather spend our time doing error checking now than have our important data test it for us later. The full format is also great for data cleaning if you plan to sell or dispose of the drive.
The final format option is the Enable file and folder compression setting, which is unchecked by default and we recommend sticking with it.
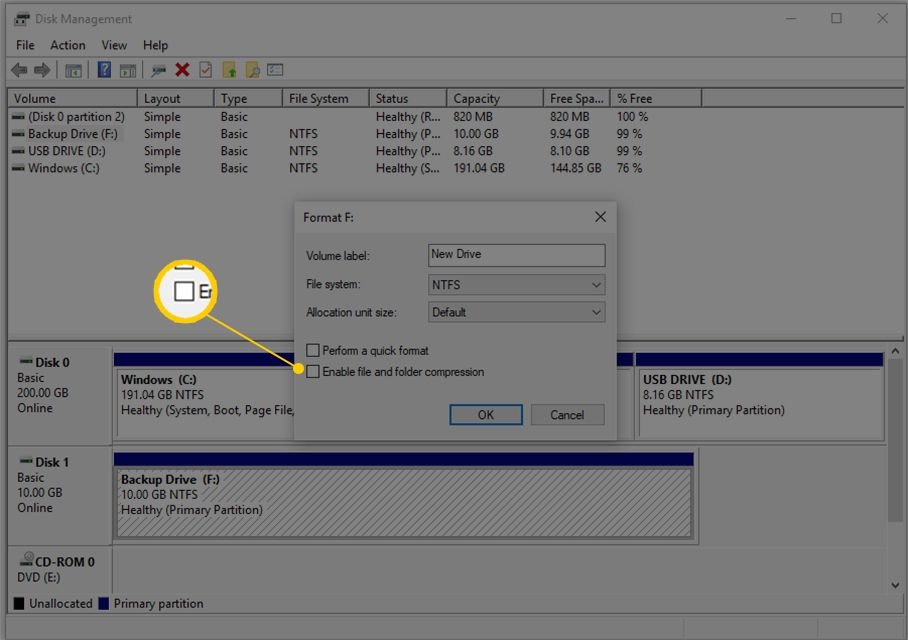
The file and folder compression feature allows you to select files or folders to compress and decompress on the fly, potentially saving significant amounts of hard drive space. The downside to this is that performance will also suffer, making your day-to-day use of Windows much slower than without compression enabled.
File and folder compression is of little use in today's world where hard drives are very cheap and very large. Except in rare cases, modern computers with large hard drives are better off conserving all of their processing power and skipping hard drive space savings.
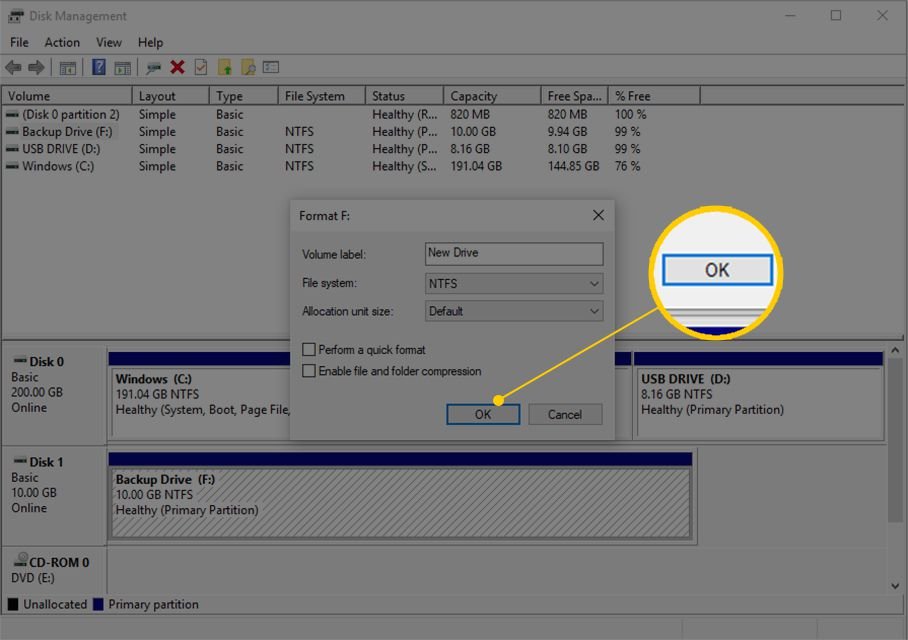
Review the settings you made in the last few steps and select OK .
As a reminder, you should see the following:
- Label : [volume label of your choice]
- File system : NTFS
- Allocation unit size : default
- Perform quick format : unchecked
- Enable file and folder compression : Unchecked
Select OK on the warning message about formatting the drive. Windows will usually warn you before you do something potentially destructive, and hard drive formatting is no exception.
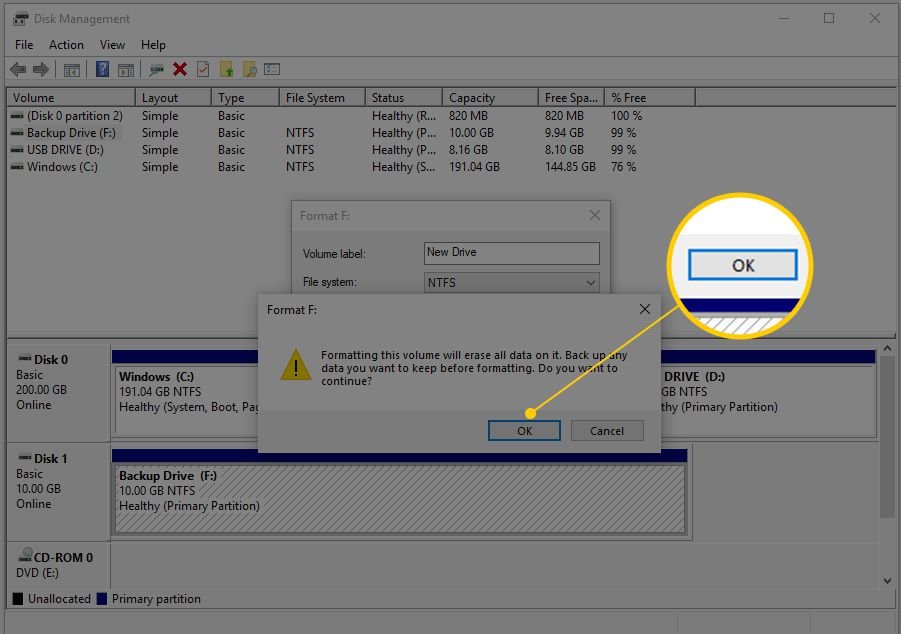
As the warning states, if you continue, all information on the drive will be deleted. You cannot cancel the formatting process midway and expect to recover half of your data. Once you start, there is no turning back. This is no reason to be scared, but we do want you to understand how final the format is.
Hard drive formatting begins! You can check the progress by observing the "Format: xx%" indicator under the Status column at the top of Disk Management or in the graphical representation of your hard drive at the bottom.
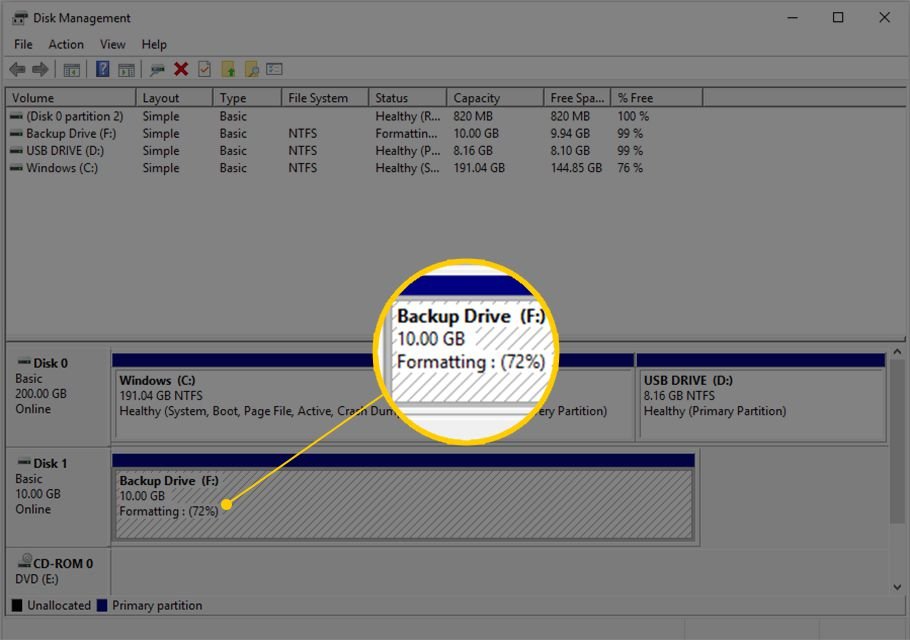
If you choose Quick Format , your hard drive will be formatted in just a few seconds. If you choose the standard format we recommend, the time it takes to format the drive depends almost entirely on the size of the drive. Small drives will take a small amount of time to format, while large drives will take a long time to format.
The speed of the hard drive and the overall speed of the computer will play a role, but size is the biggest variable.
Disk Management in Windows does not flash a large "Your format is complete!" message, so after the format percentage indicator reaches 100% , wait a few seconds and then check again under "Status" and make sure it is like the other The drive is also listed as "Healthy" .
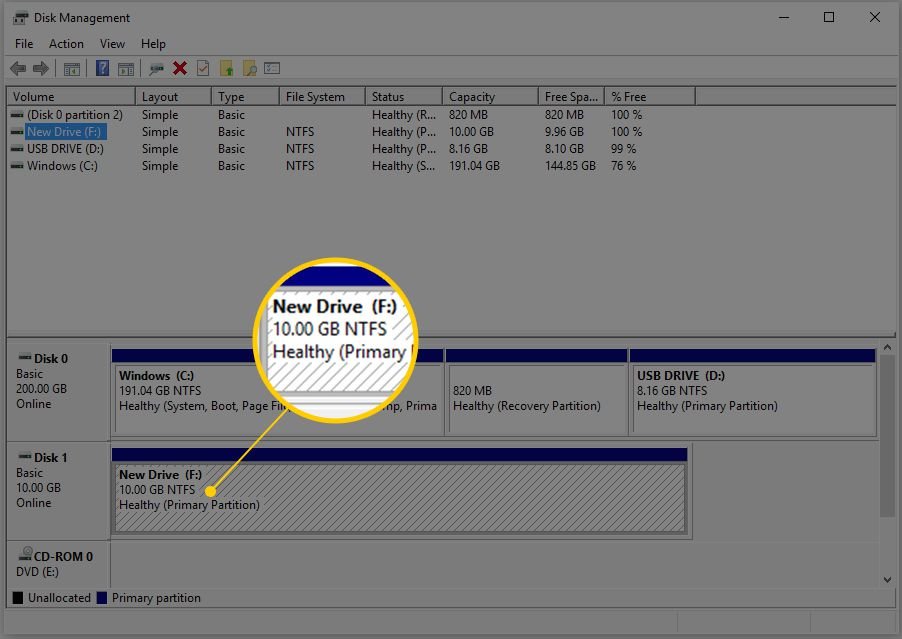
You may notice that now that the format is complete, the volume label has changed to what you set it up (in this case, a new drive ), and % Free is listed as 100%. This incurs some overhead, so don't worry if your drive isn't empty.
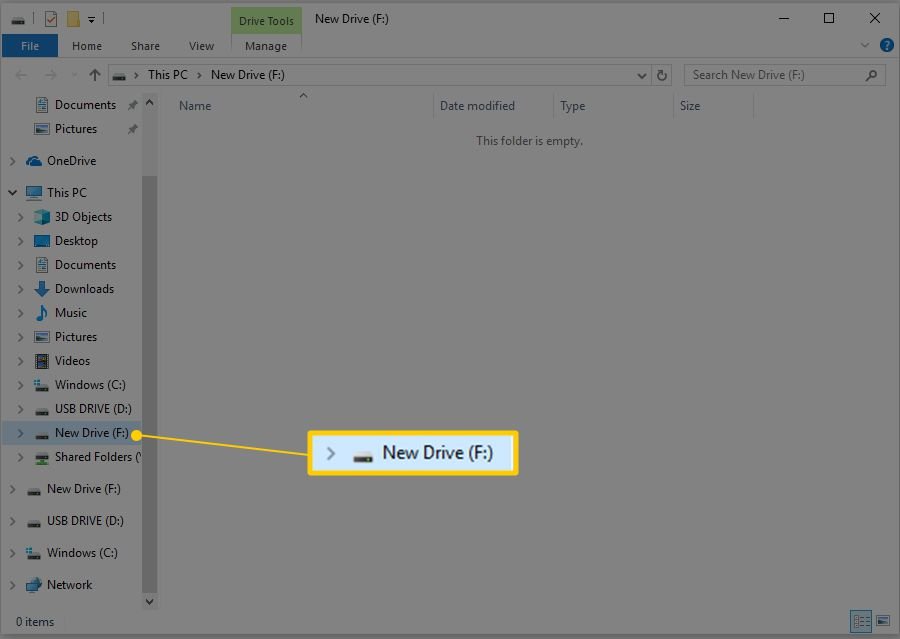
That's it! Your hard drive is formatted and ready for use in Windows. You can use the new drive however you want—back up files, store music and videos, and more.
If you want to change the drive letter assigned to this drive, now is the best time to do so.
When you format a drive in Windows, the data may or may not actually be deleted. Depending on your Windows version and format type, the data may still exist, hidden from Windows and other operating systems, but still accessible under certain circumstances. Technically, there is a difference between deleting and wiping a drive.
If you want to format your hard drive so you can reinstall Windows from scratch, your hard drive will be automatically formatted during the process. You can also format a hard drive from the command prompt using the format command.
FAQWhether it's an internal or external hard drive, the steps to format your hard drive are the same: Connect the external hard drive to your computer and select it in the Disk Management tool.
To completely erase a hard drive, use free data destruction software, use a degausser, or physically destroy the drive.
If you can't format the drive, there may be a virus, or you may need to repair bad sectors. As an alternative, you can try formatting the drive from the command prompt.
