If I say "quick and easy hairstyles," what's the first thing that comes to your mind? Ponytail? Top knot? While these are cute and classic options, we all do them, so we all know how easy they are. On top of that, headbands can actually cause damage to your hair. So, if you want to make it simple and cute without causing too much damage, try some hairstyles that only use bobby pins. While these styles take about the same amount of effort as the top knot, they look like they require more effort and bring a little something extra to the table. But before you get started, here are some tips to help your style stay in place longer.
First, if you can, invest in some professional-grade hair clips. Since they don't have the plastic coating like drugstore pins, they won't slip out of your hair easily. However, if you still want to use the drugstore version, it will work better if you spray it with hairspray or dry shampoo first. Second, always make sure to insert pins with the ridged side down (unless they have decoration on that side) for better retention. Finally, try not to open the bobby pin too wide before inserting it into your hair. By forcing the hair clip open, it loses some of the tension it needs to hold your hair in place better. Now let's start pinning.
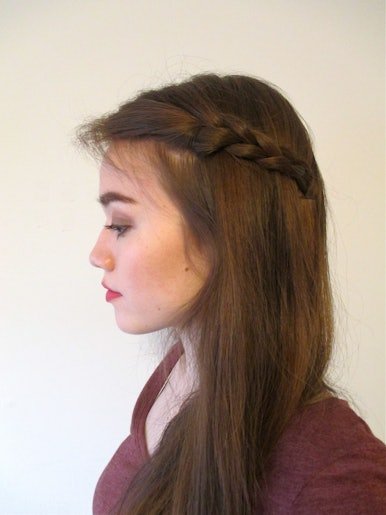
1. French braid in the front (1-2 bobby pins)

To achieve this effect, start by cutting off some hair along the hairline. Then simply French braid, making sure to pull up all the front sections so your hair doesn't fall into your face. With your hands slightly above your temples, secure the braid behind your ears with one or two bobby pins, pointing towards the back of your head. Then let some hair fall at the end of the braid to hide the pins.
2. Triangular pins (3 hairpins)
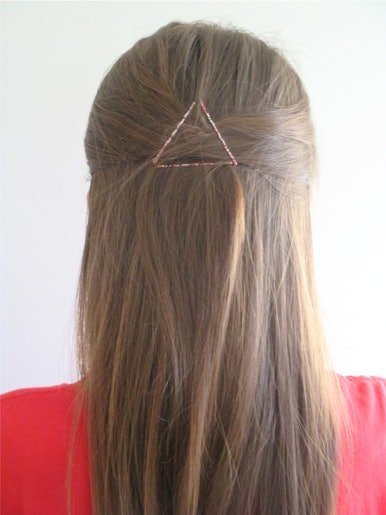
To do this, pick three more decorative hairpins. Take two small sections of hair from the front of your face and pull them back. Secure each section with a bobby pin at an upward angle to form two sides of a triangle. Then simply drive the third pin directly through the bottom, connecting the triangle. I know this one looks a little difficult to do since it's on the back of your head, but your fingers will easily feel the triangle shape and be able to close the gap.
3. Front twist (1-2 bobby pins)
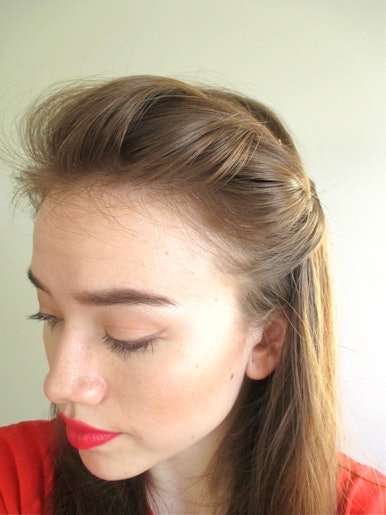
This is similar to a French braid, but simpler. All you have to do is wrap the top front hair over the next front hair. Continue until just above the ears, then use one or two bobby pins facing the top of your head to secure the twist.
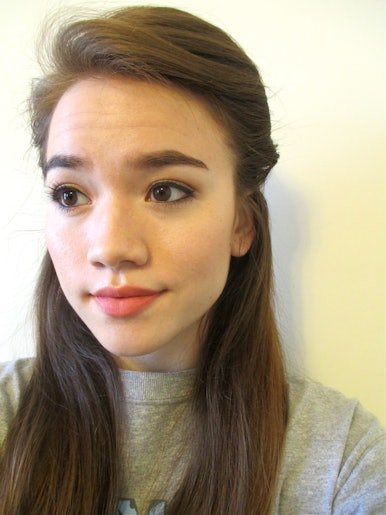
4. Accent braid (1 bobby pin)
Ready for something simpler? As you braid, grab a section of hair in the front so it's parallel to the ground (this will help it lie flat on your head). Then, just take a bobby pin and secure it to one side of your head. The trick here is to secure the bobby pin with its opening facing the front of your head. This will help hide the pinned ends and is actually safer than pinning in the same direction of the braid.
5. Mini Victory Roll (4 hairpins)
For the last one, start by grabbing the front of one side of your hair and twist it back. Then push it forward slightly to increase the volume of curls, and then place a hairpin parallel to the ground, facing the back of your head. Secure the first bobby pin with a second bobby pin and secure the first bobby pin over the first bobby pin with the opening facing the top of your head. This will secure the roll. Then repeat on the other side. Look!
Image: Mickey Hayes(9)
